
CONSTRUCTION OF THE 4X10 VERTICAL CAMERA
FINISH WORK, BELLOWS & GROUND GLASS
ONCE THE FIT OF ALL THE PARTS HAS BEEN CONFIRMED, THE ENTIRE CAMERA MUST NOW BE COMPLETELY DISASSEMBLED. THE WOODEN PARTS ARE FINE SANDED AND GIVEN 2-3 COATS OF CLEAR GLOSS VARNISH. THE BRASS HARDWARE IS BUFFED AND LACQUERED. ONCE EVERYTHING IS DRY, FINAL ASSEMBLY AND FITTING BEGINS.

The base after its first coat of varnish.
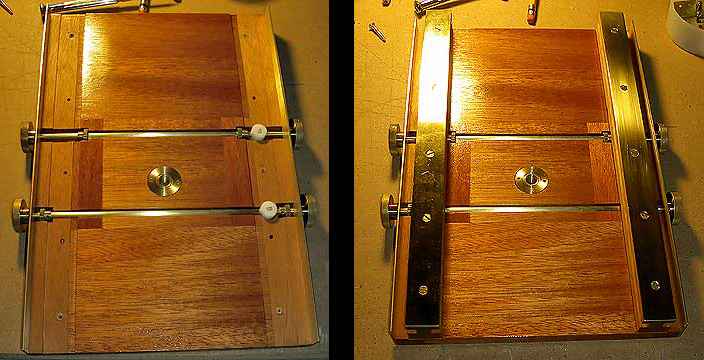
Assembly of the base begins by installing the drive hardware for the front and rear focus beds. Then the slider guides are installed. In the second photo the tripod mount is in place and the base is now complete.
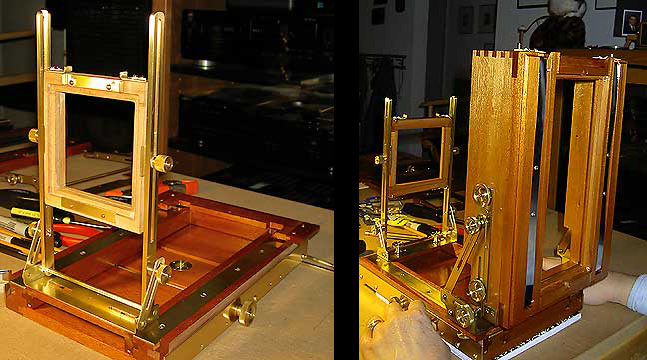
Next, the front and rear standards are assembled then mated with their respective sliders and installed in the base.
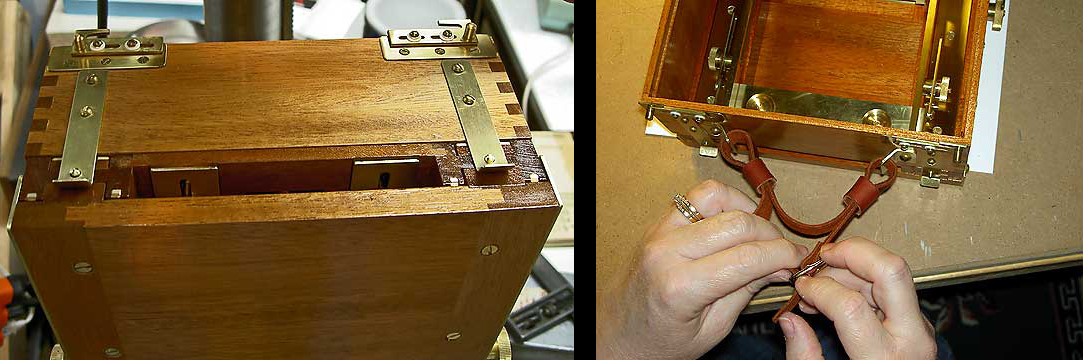
The bed latches are installed and then the carrying strap.
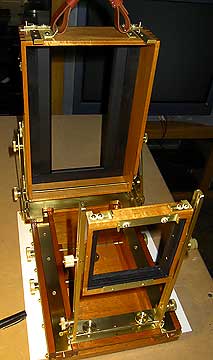
The camera hardware is now all assembled, fitted and tested.
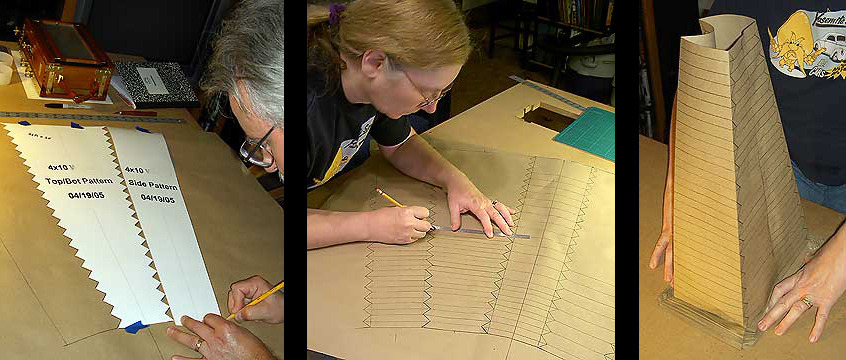
Next step is to build the bellows. A scale drawing is done using CAD software. Once the dimensions are confirmed, a full size paper pattern is printed. This pattern is used to layout the bellows on heavy craft paper. The paper prototype is scored then glued.
The paper prototype bellows is folded and then used to confirm a proper fit to the front and rear bellows frames. If the fit is not correct, then adjustments are made to the patterns and another prototype is folded.
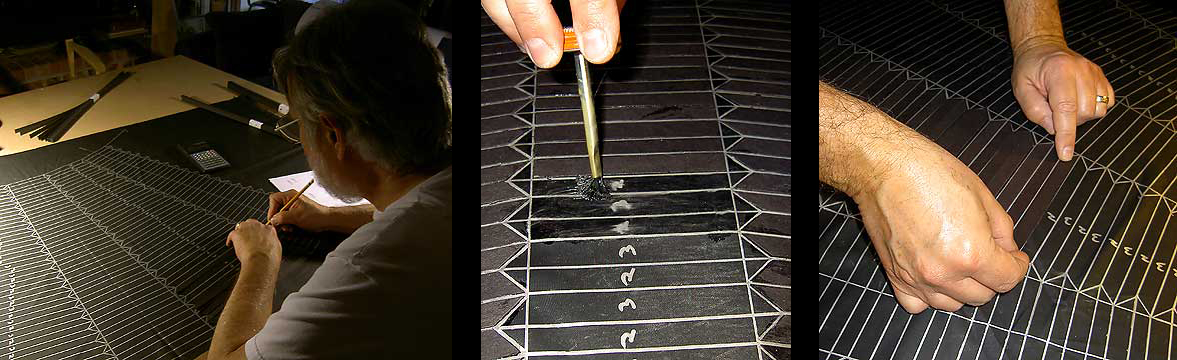
Once the bellows design is confirmed, the pattern is laid out on special rubber coated nylon cloth. Contact cement is used to glue hand cut card stock ribs to the material.
NOTE: Don’t ask me where to get this material. We found a bolt at a local fabric store and bought all they had. They were unable to obtain any more since it is a special order from an overseas manufacturer. I was able to find a company in Japan that would make the cloth, but you have to order 3,000 meters minimum. If you want to build bellows you are on your own when it comes to the material.
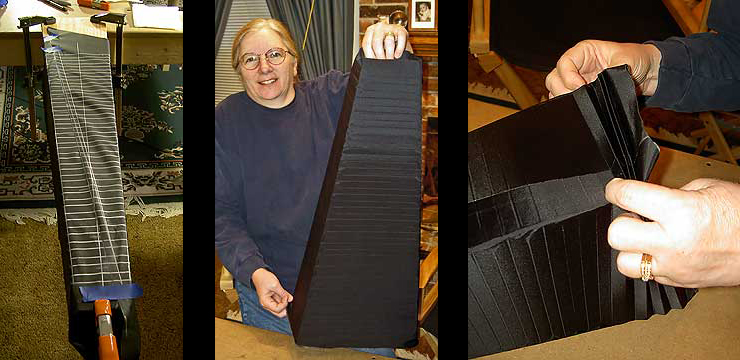
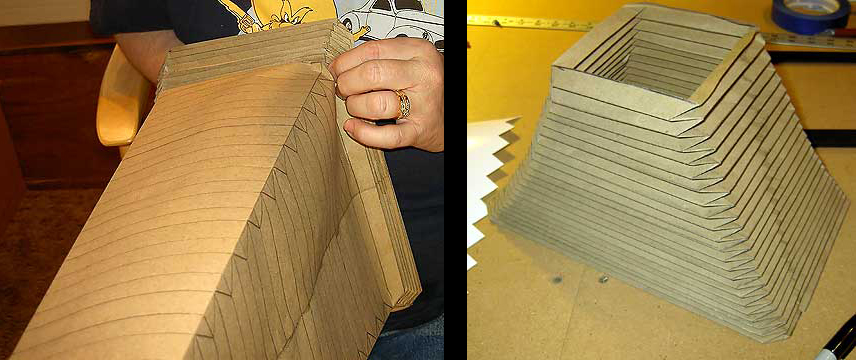
Once three sides of the bellows are glued, it is taped to a wooden form where the fourth side is seamed together and the final ribs are glued (first photo). Once the ribs are glued, a black cotton cloth liner is glued over the ribs. The bellows is made inside out and must be turned once assembled. The small end is fed into the larger end and pulled through. Now the bellows is ready for folding (middle photo). Folding starts at the large end and continues until the entire bellows is folded flat.
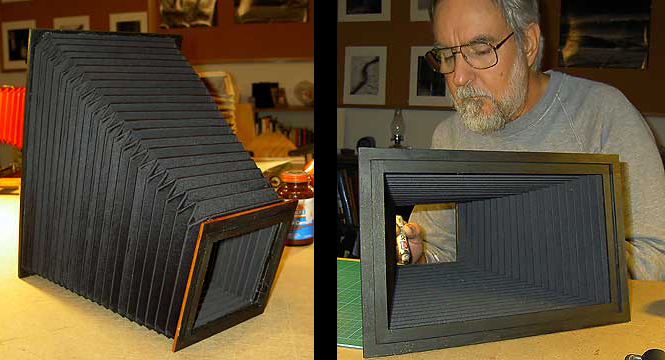
Once folded, the bellows is glued to the front and rear wooden bellows frames.

A piece of framing glass is cut to size for the ground glass. The edges are smoothed and two grades of fine aluminum oxide polishing compound are used to grind a fine surface on one side of the glass.
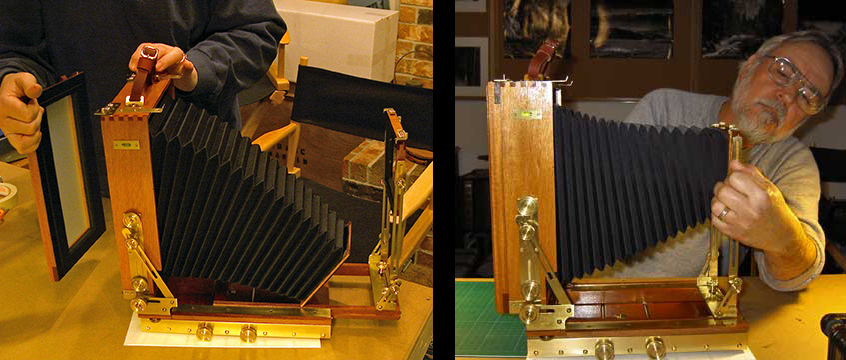
With all of the parts finished, here is the final assembly of the camera. Note that the rear standard hardware was scavenged from the original 4×5 camera back that was no longer being used. All other wood and metal parts were fabricated by me from scratch. The existing rear standard hardware was used to expedite the design, since we had a project deadline to meet.