24
Mar
2013

 Working in the wet darkroom processing both film and paper is nothing more than simple lab work. You are a lab technician in charge of performing a series of processes. These processes must be done exactly the same way each and every time in order to guarantee consistent results. Any variation in process or mixtures will affect the end result.
You have to keep track of exactly how you process both film and paper. Consistency is of paramount importance when processing film. You only have one chance with your film and if you make a mistake there is no going back. If you happen to make a mistake when printing you can always start again. You only lose a sheet of paper. With the film, you loose the image forever.
It is imperative that you do everything exactly the same every time. Any variation, even down to the tray sizes and volume of chemical can affect the end result. Film processing is not hard, but you have to do everything exactly the same every time. It is also worth mentioning that you have to be scrupulously clean. Contamination of any of the processing chemicals can cause disastrous results. One thing that is easily overlooked is mixing up the stock solution tops when using developers that have more than one part. Only remove one cap at a time and replace each before opening the next. Also, mark each cap and never mix them up.
Good darkroom habits begin with keeping notes. I keep a three ring binder containing notes on all of the procedures that I use in the darkroom. I have notes for each film size that includes the size of the trays, chemical mixtures, volumes of chemicals, and number of sheets of film for each processing run. When I begin a film processing session, the first thing I do is grab my darkroom notes. I make sure that I do the exact same thing every film run.
Even the printing process needs to have order and a plan to ensure you do not end up chasing your tail. My darkroom notes also contain information that pertains to printing. Though not as critical as film, I want to be sure I do things in an orderly and repeatable manner. I also want to be sure I mix all of my chemicals correctly, so everything is written down.
One of my favorite darkroom stories comes from Fred Picker. In his information packed little book titled “ZONE VI WORKSHOP” he describes his early days trying to get a handle on the process of B&W printing. If you have a copy of this gem of a book, turn to page 40 and read the chapter titled “THE CUSTOM LAB.” This is a really good account of how NOT to print.
I keep notes on most everything I do in the darkroom. There are times when I cannot remember exactly how I did something. With my notes there is no question as to how to remain consistent. As Fred Picker used to say, “DIFFERENT IS NOT THE SAME!”
JB
 I have been doing some upgrades to my spotting microscope and due to the interest this seems to have generated, here is more of the story of what I use for spotting prints and negatives and what I have learned.
STAND
The boom stand that came with the original microscope was more than adequate when spotting smaller prints, but the large base sitting on the table top was always in the way when working with larger mounted prints. I was forever having to turn the print to get to the area that needed work. The large, heavy base was always the problem, even though the boom arm reaches out 16 inches. I toyed with several ideas that would have attached the boom I had to the wall, but it still would not have been long enough, nor have enough range to be very workable. What I wanted to do was to get the stand off the table, and make the microscope more mobile.
I did some research and found that you can purchase an articulating boom for microscopes that can be clamped to a table edge or bolted to the wall. The articulating boom arm I found has a reach of 36 inches and will support loads up to twenty pounds. Certainly robust enough for my setup. I found the dimensions of the arm on the manufacturer’s web site and made a quick mock-up from wood to see exactly how the boom would fit on my table. The wall mount version turned out to be exactly what I was looking for. We ordered one and had it in hand by the end of the week. It was a simple matter to locate the appropriate place to bolt the mount to the wall and the entire installation took less than an hour.
The articulating boom is certainly robust enough, it weighs nearly 20 pounds and is made of very heavy steel. This is exactly what I was looking for. It provides a stable support that allows the microscope to cover most of the work table. Positioning the unit is extremely easy now.
ILLUMINATOR
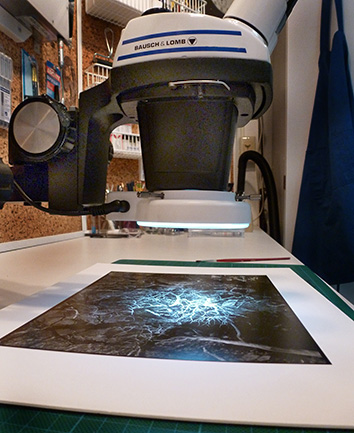
One thing I really wanted was a more even illumination under the microscope. The Bausch & Lomb 31-35-28 Microscope Light Nicholas Illuminator that came with my setup is a simple miniature spotlight. It is certainly bright enough, but the light is very harsh and directional. The unit fits into an angled hole in the back of the Focus Mount and illuminates a small circle of light just below the work area of the microscope. I found that I had to remove the print from under the microscope, find the spot under another light, mark it with the end of my gloved finger, then return the print under the microscope to complete the spotting process.
I replaced the B&L Nicholas Illuminator with a 144 LED ring light. What a difference! The print surface is now evenly illuminated. I can see spots without moving the print by looking around the microscope, then move that area into view and start work on the area. This is much better for sure. The LED ring light is dimmable and generates little to no heat. The lighting is extremely bright, even, and easy to work under.
The B&L SZ4 pod is threaded on the bottom to accept 38mm attachments. In order to mount the ring light you will need an appropriate mounting collar that fits the pod. The ring light I purchased came with a 48mm mounting ring, so I was off to the shop to spin out my own 38mm version. Found a hunk of aluminum and a couple of hours later I had my custom mount ready. Note: You can purchase a 38mm adapter if you prefer not to machine your own.
EYE PIECES
The last thing I did was to upgrade the eye piece set. The original unit came with a pair of very old B&L 10x eye pieces that I really wanted to replace. I have to admit the originals work extremely well, but after replacing them with a new set of wide angle 10x units, the difference was well worth the expense. The newer ones have a larger size that makes it easier to use wearing glasses.
AUXILIARY LENS
So, once I had everything setup one concern I had became reality. The ring light was in the way of my brush due to the very low proximity of the bottom of the microscope to the work surface once focused. I measured the distance from the lip of the ring light to the work surface and found it to be only three inches. But, there is a fix for that also. There are auxiliary lenses that screw into the bottom of the pod case that change the magnification ratio. I purchased a 0.50x lens which does three things. First; it acts as a mounting collar for the ring light (so much for my custom-made ring, oh well). Second; it reduces the magnification of the unit by one half. Third; and most important, it doubles the height of the unit above the work surface.
I now have plenty of room to work under the microscope without bumping it with my brush. Cutting the magnification by one half is not an issue, since I nearly always used the unit at its lowest magnification anyway. Cutting the magnification by one half now gives me a range of 3.5 to 15 x. The single most helpful thing about using a stereo microscope for spotting is not high magnification, but the ability to really see the area you are working on and precisely place the spotting dye on the spot and not the surrounding area.
FINAL THOUGHTS
For most users the tabletop boom stand will be more than adequate for working with prints up to 8×10 inches or even larger. If you have a deep enough work table, placing the base directly in front of you will allow you plenty of working room. My work table is not that deep, so I needed something different, hence the articulating arm and wall mount were my best choice. The tabletop boom stand weighs 34.5 pounds and is very stable. The bulk of the weight is the 0.50 inch thick steel base plate. You can see from the photo below that it supports the microscope at full extension without any danger of tipping over. I have used that setup for years on both prints and negatives.
I would like to thank Christopher Burkett for his help. He was the first photographer I saw using a microscope and was very helpful in answering my questions and helping me select a unit suitable for print and negative spotting.
I can highly recommend the B&L SZ4, since that is the unit I use. There are many other stereo microscopes that are more than suitable for the photographer. The used market is full of units that have been taken out of service in laboratories or manufacturing. A search on the Internet should find more info on what to look for and what to avoid when purchasing a stereo microscope.
As always, a very good place to look for used microscopes and accessories is the old standby, eBay. There are several instrument sellers that deal in used equipment that have stores you can browse. Again, a Google search will turn up even more used and reconditioned equipment.
Keep in mind that what I have done is upgrade my original microscope that has been in service for over five years and has been very useable in its original configuration. You do not need anything but the basic unit as described in my two previous posts titled “SPOTTING MICROSCOPE” and “MORE SPOTTING MICROSCOPE INFORMATION” to get started.
These are the refinements that I have found that make things easier and more convenient for the way I work. Be good to yourself and your eyes, let alone your art. I keep saying the same thing over and over, you can’t go wrong using a stereo microscope for spotting prints and negatives! Any microscope is better than none, or struggling with another type of magnifier. Hopefully this information will help get you started.
NOTE: I have placed the no longer needed pieces of my original microscope setup in our For Sale area. If you are piecing a setup together, you may be interested in some of the parts I no longer need.
JB
 Since I had posted my original piece titled “SPOTTING MICROSCOPE” I have received numerous additional questions. Seems everyone is looking for an easier way to spot prints, and I will tell you one thing; there is nothing better for print spotting than a good stereo microscope! There just is no better way that I have found to see and eliminate those pesky spots we all have to deal with.
First a little information on what to look for. The microscope is a modular device and you can configure it to suit your needs. There are five main items you will need.
Most of the questions I have received pertain to what microscope I use. I had to do a little research as to the exact model I have. What I use is not the latest model and is probably at least 30 years old. The good news is quality microscopes are well-made and will last a lifetime if taken care of properly.
The unit I have is made by Bausch & Lomb and is the StereoZoom 4. Here is a brief description; “One of the most popular stereo microscopes of all time is the Bausch & Lomb StereoZoom 4 (SZ4), later taken over by Leica and also marketed under the Cambridge Instruments name. It was introduced in 1959 and made until 2000.”
They must have made many thousands of these units in many configurations. They are plentiful on the used market. Another question I get is how much do they cost? That depends on condition and where you find the unit. We have had ours for some time now and it seems we paid about $450.00 from a seller on eBay including shipping.
reconditioned and fully guaranteed unit from a specialty company will be more expensive. Keep in mind that the stand is very heavy and adds to shipping cost. My best recommendation is to purchase a unit with a good return policy if possible.
Here is a great site with instructions on how to service and adjust the StereoZoom 4:
http://www.covingtoninnovations.com/stereozoom
I will add a few more comments that might be helpful. When it comes to the Illuminator there are numerous choices. The unit we use is an incandescent-type that uses lenses to focus the light into a concentrated beam that illuminates the print surface. It mounts in the Focus Mount and works very well. You can also use a Ring Light mounted to the bottom of the Pod. There are numerous illuminators and some even use LEDs. I am going to try a Ring Light that I have to see how well, and evenly, it lights the print surface. Another thing I have not tried so far.
Another thing to consider is the Stand. There are times I wish the arm of the stand was longer when working on larger prints. I have been seriously looking at an Articulating Boom mount that attaches to the wall. Wall mounting will free up work table area and the boom has a reach of about two feet. Just something else to consider.
Hope this helps to clear up some of the questions. As I said in my PREVIOUS POST, “. . . a stereo microscope is the Rolls Royce of spotting magnifiers.”
JB
 I keep harping on the same old line, but it is true that everyone has their own way of doing things and I am no different. But it seems that I continue to get questions about how we work. There seems to be a misconception that when you contact print that Burning and Dodging (B&D) are not possible. That is 100% malarkey! Whether you use a spring back or vacuum frame, the image on the negative is visible against the white printing paper. Burning and dodging is exactly the same as enlarging.
Now having dispelled the myth about contact printing, and understanding things work the same, I find there are two B&D tools I use all the time. Yes, there are times you will have to cut strange shapes to make a particular B&D tool for a certain image. No matter what special shapes I may need, I find two shapes that are universally used most of the time.
By far my most used B&D shape is a rectangular piece of mat board. I use this for edges, sides and most any other large areas. The second most used B&D shape is a specially modified rectangle for edge burning. I seem to forever need to burn all four edges of most prints and why burn each edge one at a time? I cut a piece of mat board smaller in both dimensions than the print I am making. Then I cut off all four corners at a 45 degree angle. This is my Edge B&D tool and it sees a lot of use. I can burn all four sides of a print in one exposure. The farther you hold the tool from the print, the larger the area that is held back. Moving the Edge B&D card either in a slow circular motion, or moving slowly up and down, yields a nice even edge burning all the way around the print.
I mostly print 8×10 and 11×14 negatives, and I mostly contact print, so I have two Edge B&D cards for those size prints. I use a custom handle to hold dodging shapes fashioned after Fred Picker’s Lawton Dodger. Most of the time, I have my Edge B&D card taped to my dodger.
This is something to think about and may work as well for you as it has for me. And, this is not just for contact printing. It works equally well for enlarging. Try making your own Edge B&D card, you may like using it!
JB
 I ran onto an article by David Vestal published in an old Photo Techniques magazine from 2002 that seems to sum things up very well.
“Some people say that we should never crop photos. They’re wrong. When cropping will help the picture, it’s better to crop it than to leave it uncropped. If it doesn’t help the picture, then why bother? But it is an option, and it’s not a moral issue. We don’t need anyone’s permission. If you do it, do it well.” *
I couldn’t have said it better. . . thank you Mr. Vestal!
JB
* David Vestal, Advanced B&W Printing, Photo Techniques Magazine, 2002
 NOTE: I wrote this little rant over a year ago and never published it. Guess it got lost among all the other posts and I have just resurrected it today. I know I am repeating some things here, but I do so only to make my point. My views have not changed.
I am forever asked, why the wet darkroom? Why would you want to work with film and photographic paper when you can just click the mouse and let the magic box (computer) create a visual paradise? I am perpetually searching for the answer. . . an answer that makes sense to me, and at the same time explains why to those that ask. I have to begin by saying that nothing is ever as it is advertised. Those that have something to sell always tout how easy it is when you buy their products. If you are looking for quick and easy, then photography may not be for you, matters not what the hype says. In all of those slick commercials and magazine ads things just fall into place without any effort. Everyone has a big smile on their face and all is well. Can this be reality?

A lot of what we see today is a continuation of the biggest lie ever told about photography back in the early days of the medium. George Eastman, founder of Eastman Kodak Company, came up with a catchy slogan when he introduced the Kodak camera in 1888. His little box camera was the first camera intended for the general public and his slogan was simply, “You Press The Button, We Do The Rest.” This catch line implies that the person making the photograph need do nothing but be there, of course with a Kodak camera, and that person need know nothing, nor do anything, other than press the button and send money to Kodak. This slogan was a work of sheer genius. It made photography easily accessible to the general public and made ‘ol George very wealthy. There is absolutely nothing wrong with any of this, except for that little phrase, which implies that the operator hardly even be present. Anyone that has used a camera knows for themselves that there is more to it than just pressing that little button.
 Now I can mention the next biggest lie ever told about photography, this one somewhere in the early 21st century. I am not sure exactly where this came from, but I venture to say it came from large corporate marketing gurus, better known as Harvard MBA’s. When you have large companies run by people that know nothing about the products they produce, you have idiots at the helm. They worship at the altar of the share holders and the quarterly report. Enough said! The next big lie in photography is, “Film Is Dead.” I still believe this was nothing but a marketing ploy to guide the easily persuaded customer to purchase more equipment and new technology. This time based on the layman’s misunderstanding that the computer can do anything with only the click of the mouse. You need do nothing, but supply the money. The old slogan could have been upgraded to read, “You Press The Button, The Computer Does The Rest.” I believe that by now, anyone that has tried this knows, again from hard experience, that it just isn’t that easy. No matter what the hype from any manufacturer, there is no quick and easy way to photographic success.
Having said all of this, I feel that the art of photography is something that requires dedication and perseverance. You have to choose your tools carefully and make sure you have the correct tools for your creativity. I have my own opinions as to the validity of what I do and why I do it in a way that suits me. For what I am about to say I have been belittled, scorned, laughed at, and cursed. Makes no difference to me. Anyone small-minded enough not to accept and respect my choices make no difference in the grand scheme anyway. My father used to say that people that use curse words have a narrow vocabulary and an even narrower mind. So my favorite description as to the validity, use, and purpose of digital imaging. . . there I said that word, Digital. . . is to simply say, “It Is Only Another Art Form.” Simple as that! Choosing the wrong medium will turn into nothing but a waste of your time.
 Digital imaging is not a replacement for anything. It is its own entity, has its own strengths and weaknesses. If you choose to work in the Digital arts, good for you! If you are a hybrid photographer, shooting film, scanning and printing digitally, then great for you! If is suits you and you are happy with what you create, then that is just fine with me. If whatever you create suits you, no matter what the medium, then you are on the right path. But, whatever you do, Do Not belittle me for not buying into the farce that Digital is a replacement for Film! And please do not propagate this lie to others that are new to photography. You are doing them a great disservice by funneling them into believing there is only one path. Nothing is more degrading and discouraging than to find out, much later, that you could have done something else that was much more to your liking. People need choices, and need to be able to see all of the different options that are available in the world of photography. One size does not fill all.
I realized I still have not answered the question, why the wet darkroom? All I can honestly say is, this is my choice. This is what I choose to do with my life. I can also say without reservation, that for me, a computer screen, keyboard and mouse comprise a place to work. This is where I go to get things done, find information, communicate, write (like this little rant) and to get my days work accomplished. This is not a place for me to create art. There is nothing artistic for me in front of a digital display. I do not feel anything artistic sitting at my desk, and creating art does not happen if I am not in that mood. I see the computer as a place for 100% left brain activities. When I go into the darkroom and close the door, I am immediately in right brain mode. This is where I create. Same as when I duck under the darkcloth behind that view camera. That little LCD screen on my snapshot camera is just for record keeping. There is nothing artistic there for me either. This is how I think. This is how I work. And this is the best I can do to describe why. If you find digital motivating and productive, then by all means use it to your best advantage. I find nothing about it in any way creatively stimulating for me. That is my choice. Do not belittle me if you do not agree. Creativity is fragile and is only where you find it. Use it wisely!

One more thought. I am not on a crusade to convert the world to film. I am only on a quest to try and show everyone that there are choices. . . that the wet darkroom is still alive. If you are interested, you can still choose the medium that best suits you. Matters not whether it is the mouse or the photo tray. What is really important is that everyone knows there is a choice and they should be aware of the strengths and weaknesses of each. To be boxed into that one size fits all world is not good for anyone. Hopefully by now you understand why I choose to work in the wet darkroom.
And, one more final thought. Just in case you believe the hype that film is gone forever, take a look at my earlier post titled, “FILM IS NOT DEAD.” You can special order both B&W and Color film in any size imaginable! No matter what photographic medium you use, the next time someone asks you about photography, do not propagate the lie that film is dead.
JB
 We had a fun time today at the Grapevine Camera Show. Actually found several things that we didn’t already have laying around. Funny how many things are FREE. . . especially when related to film and darkroom. A full bottle of selenium toner, and a near full bottle of Photo-Flo, and six rolls of very old 35mm film for David’s darkroom workshop.
You never know what you are going to find. There have been times we have walked out without a thing to carry home, but not today!
 This is an interesting question that comes up all the time and seems to keep reoccurring. When will you give up film photography and move to digital, is something that is asked of me from time to time? My answer has been consistent since digital photography moved into the mainstream. Personally, my answer is, “I will give up photography completely if I have to go digital.” Plain and simple. . . I will never be able to create serious art with a computer.
My entire life has been spent in and around the electronics world. I began using a computer when the first Commodore Vic 20 hit the market. I had to learn computing in order to stay current in the engineering world. I see a computer as an engineering tool. It is not a toy, not a game machine, not a source of entertainment. It is a tool for designing complex machines and circuits. . . for navigating to the moon, and the stars. One thing is certain for me, it is not a device for creating my art.
I use a computer for work; I use it to write; I use it to access the Internet; I use it to communicate with others; I use it to update my BLOG; and I use it to host a web site. These to me are not artistic endeavors.
In my mind, a computer is not where I go to express myself visually. It is not where I go to create my art. In front of a monitor I am in a working mindset, mostly thinking in left brain mode. Creativity requires a catalyst. Only out in the field with my camera under the dark cloth, or in the darkroom does my mind really shift into right brain ‘creative’ mode. It is impossible for me to think in an artistic manner when clicking a mouse and looking at a monitor.
I know I have written about this before, but the same question keeps coming up, and my feeling about the subject does not change. This is how I work and how I think. The creation of art is a very personal thing and requires you think in a particular way. For me, I can only create when I am in the proper environment, and cyberspace is not the proper environment for me.
 Everyone has their personal way of doing most anything. I have sorted through what works for me and it may not be the only way to do things, but it is the way I have refined and standardized my working habits. (I hate the term ‘workflow’ sounds way too digital for me.) What I have tried to do is explain how I work in the darkroom. You can use my methods as a starting point and determine what works best for you.
Selenium toning of finished prints is a given for what we do. Every print is toned in selenium, for permanence, a slight shift in print color, and to enhance tonal range. We have used numerous dilutions of toner and what works for one paper and developer combination, may not work for another. When it comes to the dilution and time, you have to experiment.
Here is how we selenium tone prints. Not sure exactly where all of this came from. Some from Ansel Adams, others from Fred Picker. Never the less, here is our standard procedure.
Prints are developed, stopped in acid stop, then fixed in an acid sodium thiosulfate fixer for four (4:00) minutes. The finished prints are rinsed in running water for five (5:00) minutes or so, then transferred to an archival washer. The washer is used as a holding bath during a printing session that may last all day.
Once printing is finished, each print is evaluated and may receive further processing by some selective bleaching. After bleaching, the prints are washed again in running water and again end up in the archival washer for storage.
At this point it is time to start toning. We use three trays when selenium toning. The first contains plain hypo (Hypo), the second selenium toner at some predetermined dilution (Toner), and the third tray is hypo clearing agent (HCA).
Prints are removed two at a time and placed, back to back, in the Hypo tray for about four (4:00) minutes. This is your second fix. The Hypo is an alkaline fix and is necessary to prevent stains, since any acid in the toning solution will result in undesirable stain. If you use an acid first fix as we do, be sure to wash well before placing into the Hypo. You do not want to carry any acid into the alkaline Hypo.
First, here is the subject; a blind cave between two large sandstone fins in Arches National Park.


