Photography

THE VIEW OUT MY WINDOW SYNDROME

I have struggled for years to understand the concept of what is visually stimulating. Just exactly what does it take to strike a nerve that leads to the successful completion of an expressive photograph? Specifically, why is it that I cannot easily find something in my immediate environment that I find worthy of photographing? There was a time when I really thought there was something wrong with my perception of my surroundings. Edward Weston said something to the effect that, you should be able to look down at your feet and find something interesting to photograph. Doesn’t always work for me.

The trouble is, I have a difficult time finding anything within my local surroundings that excites me very much. Some of this has to do with the fact that I live on a flat coastal plane at 600 feet above sea level and what I like the most is mountains and snow. I just can’t seem to find barb wire fences to the horizon, hay rolls, or wind mills that interesting.

I used to think this was only a personal mental issue that I alone suffered from, and that I was in some way creatively impaired. I thought that all I needed to do was find some magic somewhere that would allow me to visually connect to what I see every day. There were those times that I was able to find visual stimulation. Such as dense fog, or really interesting clouds, or maybe a rare snow storm. But most of the time I found that I was forcing myself to just get out and that what I created was not something I really cared for. So, why bother?

As I began to associate with other photographers, many living in other areas of the country, what I found was surprising. I met and talked with people that live in some of what I feel are the most visually stimulating places on the earth. To my dismay some of them have no interest whatsoever in even visiting, let alone photographing what I would give near anything to have unlimited access to. I have talked to people that have grown up within a few hours drive of these places and have never visited, let alone ever had even considered to take a look, let alone make a serious photograph of what lay literally in their back yard.

I began to realize that I was not alone when it came to finding inspiration and visual excitement within my immediate environment. I began to think more in terms that this is a normal ‘thing’. . . a ‘syndrome’. . . a ‘phobia’. . . or whatever, that many other suffer from, or in some way deal with, also.

I am a big fan of the late Bill Jay. His writing on photography is classic. I found this excerpt from one of his most popular pieces and it seemed to connect to my thoughts about this perplexing condition;

“. . . in order to photograph with any degree of continuous passion, you must have a fascination for the subject, otherwise you cannot sustain an interest in the act of creation for a long enough period of time in which to make any insightful or original statement about it.” 1

Thank you Bill Jay!

I have now accepted my condition and even dredged up a name for this phenomenon. I call it, “The View Out My Window Syndrome.” There seems to be something about what you have seen every day of your life and how visually exciting that view becomes over your lifetime. At least for some of us, this is some sort of syndrome. The question is, what can you do about it?

I have come to believe that there is little you can do about The View Out My Window Syndrome. . . so you just live with it. Maybe it is more important to accept it and not obsess over something you have little control over. Make it your goal to find and photograph whatever excites you and do not bother with what lay outside your window, especially if it does not excite you!

I started working on this post some time back and have now returned to complete my thoughts. We have had an unusual winter storm here in Texas. We are on the fourth day of cold, ice, and snow. Today we just had another 2-3 inches of new snow. This is the kind of weather we love when we are out in our favorite areas. . . in the mountains or the visually stunning S/W. Yet with all of this nice cold and snow I have little to no interest in dragging a camera out. The back yard is as boring as the back of my hand. I cannot think of any place near by that I would risk driving to that would be visually exciting, even with a gorgeous coating of snow. Maybe if I did get out I could find something, but I really have no inclination to risk being ran over by some idiot driving on ice. When in the mountains or the desert S/W I don’t mind driving 40-50 miles on solid ice to shoot some film. Here, I don’t even want to walk to the mail box. Why? Good question, but this is an example of a bad case of “The View Out My Window Syndrome.”

JB

1 “The Thing Itself; The fundamental principle of photography” First published in Newsletter, Daytona Beach Community College, 1988
http://www.billjayonphotography.com

Posted by JB Harlin in Commentary, Photography

FILM DIAGONAL

Sometimes it is necessary to know the diagonal dimension of a particular film format. This is especially true when trying to determine if a lens has a large enough image circle in order to adequately cover a certain film format. Modern lens manufacturers publish specifications that will tell you the maximum format the lens is designed for. But, with older lenses this information is sometimes not available. If you can determine the image circle of the lens, then you can determine which film sizes will work with the lens.

For example, say you are contemplating buying a lens and you know the image circle is 325mm. Looking at the table below you will immediately see that 325mm is the exact diagonal of a sheet of 8×10 film. This lens would probably work. But, you would have absolutely no movement available when using the camera. This lens would adequately cover 4×10 and would have generous coverage for 5×7 and 4×5 formats.

Here are a few common film sizes and their diagonal dimension;

FILM DIAGONAL

If you need to calculate the film diagonal of any format, here is the formula.

FILM DIAGONAL

A = Film Height
B = Film Width
C = Film Diagonal

Keep in mind that the actual image area is slightly less than the film dimension due to the hold-down guides that keep the film held in place in the holder. This calculated diagonal measurement is plenty close enough to determine adequate image circle of any lens.

Hope you find this information helpful!

JB

Posted by JB Harlin in Film, How-To, Photography

SPOTTING MICROSCOPE

MICROSCOPE

If you are like me, you really hate having to spot prints. You especially do not like spotting negatives. I struggled for years trying to come up with a good way to spot prints. The problem is getting a good look at what you are working on, with enough detail to accurately guide that hair-fine spotting brush to just the right spot. I used a loop. . . tried magnifying glasses. . . used a magnifying viewer for some time, but nothing gave me a really good view of what I was working with.

MICROSCOPE

Somewhere along the way someone suggested using a stereo microscope. What a stroke of genius!

After doing some research it became clear that a high-quality inspection microscope, with magnification in the 8x to 10x range was prefect for spotting both prints and negatives. A good stereo microscope with zoom was exactly what is needed. The ideal setup would have a long boom stand so you can swing the head out over the work area, and for spotting prints you need an illuminator. I was able to find an entire microscope package including a zoom stereo head, eyepieces, long boom stand with heavy base, and illuminator on eBay.

The microscope head that I have has a zoom range of 0.70 to 3.00 x. Using a set of eyepieces that are 10x, I have a zoom range of 7.0 to 30.0 x. This is perfect! Most of the time 7x is fine, but if I have a really tiny pinhole I can zoom in even more. The microscope illuminator is necessary for working with prints, while you will need a light box for working on negatives. This is why you need a good, adjustable, boom with a heavy base.

It takes a little getting used to, but a stereo microscope is the Rolls Royce of spotting magnifiers. Well worth the expense. This type of microscope setup is used in manufacturing quality control to inspect small parts and comes up in the used market frequently. Searching out a good microscope will save you a lot of headaches and make that unpleasant chore of spotting a little more tolerable.

JB

Posted by JB Harlin in Darkroom, Film, How-To, Photography

UTAH 2010-2011 TRIP SNAPSHOT ALBUM

Our 2010-2011 Snapshot Album is up and ready for viewing.  We had another great trip and you can find our album HERE.

Posted by JB Harlin in Photography

UTAH 2010/2011

We have returned to warm Texas after another month long adventure photographing in Utah. This year we spent our time equally between Springdale and Moab. We had varying weather ranging from warm and wet to cold and snow. It was mild in Zion and we experienced a flood. They had a year’s worth of rain in eight days. The park was closed for two days and some areas were evacuated. Water everywhere.

We left Springdale early to get ahead of a winter storm that dumped ten inches of snow in Arches NP and eighteen inches in Canyonlands NP after we arrived. Temperatures changed from mild to a low one morning of -9F and warmed most days to a balmy 15F.

We had a great time. We lost a lot of shooting days to weather, but still made the most of it. Saw truly amazing things and hopefully brought back a few keepers. Now we are working on getting our film notes in order so we can start processing film and we are also working on our snapshot album. Hope to have some snapshots up on the web site soon, so watch here for more information.

Hope everyone had a great Christmas and New Year.

JB & Susan

Posted by JB Harlin in Photography

FRAMED

We recently had an interesting conversation with a local gallery curator and found that we unanimously agreed on one thing. Most art and all photography should be displayed in the most simple manner possible. Nothing is more distracting, and annoying, than an obnoxious presentation. Large, gaudy, frames with funky colored mats are just plain ugly. Our approach is to keep the presentation simple. The framing and mat should be completely transparent. It should only exist to isolate and protect the photograph. If you notice the frame and mat before you see the image, it is just not right. The KISS Principle (Keep It Simple Stupid) is the only way to display photographic art.

For us, you will not find any of our prints mounted and matted with anything other than pure white, acid free mat board. If we frame for exhibition, we use narrow black aluminum frames. The only other frame we would consider would be narrow natural finish maple. Our first choice for glazing would be glass, with acrylic as the second choice. That is it. Anything else is just plain gaudy and unnecessary.

So, just in case anyone is interested in the materials we use, here is a list;

• Light Impressions Westminster Bright White Buffered 100% Cotton Rag 4-Ply

• Frame Fit Co. Crestline Satin Black 9/32” Aluminum Frame plus Hardware

• Art Guard Glazing Products Plain Clear 2.5mm glass

• Wire & Cable Specialist SoftStrand Picture Hanging Wire #4

Those are the basic materials you will need. It is a good idea for you to learn to mount, mat, and frame your own photos. You should learn to cut your own mats. A Logan Simplex mat cutter is not excessively expensive and will serve you well for cutting simple window mats. The most expensive piece of equipment you need will be a good dry mount press. The Seal 210M is the workhorse of mount presses. Watch the auction sites and buy used, a Seal mount press will last a lifetime. This equipment is not extremely expensive and will pay for itself quickly. You will save a bundle of money and will have 100% control over the display of your art.

For more information, take a look at these articles; “DRY MOUNTING PHOTOGRAPHS” and “ADJUSTING THE DRY MOUNT PRESS” on our web site.

Remember, when it comes to displaying your art. . . simple. . . consistent. . . non-intrusive. . . is the look you want. If you are going to get framed, be sure to think simple!

JB

Posted by JB Harlin in Commentary, Photography

GETTING OUT

We are pleased, and honored, to have been invited to join a local, yet small, group of large format photographers this year. We have had numerous outings throughout the year around the area and had a really good time getting out to shoot some film and talk shop with a great group. Thanks to Eugene, Michael, Bob, Glenn and others. We are looking forward to more photographic adventures in the new year!

Our local large format photo group has proven to be a great test bed for new cameras. Moving to a new, lighter KB Canham 8×10 has served to lighten the load on the old back and should allow for even longer excursions into the wilderness. But the really exciting thing is the new ultra-light 11×14 camera and custom backpack designed by Susan. Now there is no excuse not to shoot 11×14 out of sight of the vehicle.

It is always fun to get out and shoot and our little informal group has made several trips into the field this year. Above is a photo of the 11×14 on its first outing. What a great time we all had. Thanks Michael for allowing me to use your cheery face in the photo!

JB

Posted by JB Harlin in Photography

YET ANOTHER CAMERA PROJECT

As much as I try to not talk continually about the gear, it seems that I always end up talking shop anyway. So, here I go again talking about another project. Having built two vertical pano cameras for Susan I promised myself no more camera building. Well, I do not seem to listen to myself all that well. I have this thing about big negatives. I have chosen the 8×10 to be my every day format. But there are times that I envision something just a little larger. In reality, my favorite format is 11×14, but the camera I have been using weighing in at about 24 pounds limits its usability. The idea of a more user friendly 11×14 has been rattling around in my head for some time. I spent a lot of time looking at various camera designs with particular interest in the lighter, more back friendly, cameras.

The nice thing about building your own, is you can pick and choose the features and design that best suits you. This is exactly what I did, and I ended up with a camera that is a conglomeration of designs.

The end result is what I call the Ultra-Light 11×14. Here are the specs;

FORMAT — 11X14
FILM BACK — Horizontal/Vertical
BELLOWS — Max: 36.0” Min: 5.5”
FRONT SWING — Limited by Bellows
FRONT SHIFT — +/- 2.0”
FRONT RISE — +/- 3.0”
FRONT TILT AXIS — Limited by Bellows
FRONT TILT BASE — Forward: 45º Back: 90º
REAR TILT — Forward: Limited by Bellows Rear: 35º
REAR SWING — +/- 10º
GROUND GLASS — Acrylic
WOOD — Cherry
FRAME — Composite & Aluminum
FOLDED — 18” x 19” x 6”
WEIGHT — 13.5 lbs

The most important thing here is the last item, Weight! Once all of the camera was finalized, Susan had to build a pack to haul everything. Took several weeks, but I now have a complete 11×14 packable camera system. The pack carries the camera, three lenses, accessories, three film holders, and weighs in under 45 pounds!

Now it is time to get out and get back to what is important, making photographs. This, I hope, will be my last camera building project.

JB

P.S. Take a look at my previous post titled, “THE VIEW CAMERA IN THE FIELD” November 25th, for another photo of the Ultra-Light 11×14 with pack on its second outing.

Posted by JB Harlin in DIY, Photography

DON’T FORGET TO WRITE SANTA

SANTA LIST

Don’t forget to send your wish list to Santa. . . You never know???
Have you been naughty or nice?

JB

Posted by JB Harlin

THE VIEW CAMERA IN THE FIELD

This Is How We Work With A View Camera.

Susan Pack o1
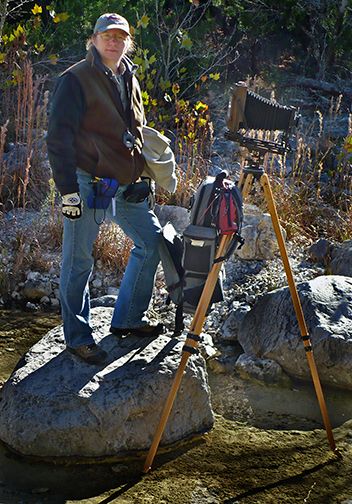
There is always a lot of discussion on how best to carry LF gear in the field. Seems that most people like to carry their camera in a backpack. That is our favorite mode of transportation in the field for sure. We like the backpack idea so much that Susan builds our packs to custom fit our cameras and accessories. All that we have learned about camera packs has been worked out the hard way. We have copied the features of commercial packs that we find useful and modified as required.Susan Pack 02

It seems that most people plop their pack down on the ground when they get ready to shoot. That is fine, unless you are in mud, water, or knee deep in snow. I have never liked the idea of setting my pack on the ground. And, yes I know, there are those that carry a tarp, but that is way too much trouble for me. I want to find my subject, plop down my tripod and then get to work without having to look for a convenient and safe place to put down the pack. This thinking led to a modification to both the tripod and the pack. Susan added a webbing loop to the top of the pack and I added a hook on the bottom of the tripod crown. This allows us to hang the pack from the tripod, keeping it out of the dirt and making it very accessible.

We both have worked out a system that allows us to carry everything we need and work efficiently in most any situation. The packs we use have a large compartment in the bottom for the camera and a separate top compartment for lenses and accessories. The custom packs also have room for several film holders.

This is how we do it and it has proven to be very efficient. However you choose to work in the field, the most important thing is to have everything you need with you, well protected, and easily within reach.

JB

Posted by JB Harlin in Film, Photography