24
Jul
2013

 There are so many gadgets that have been devised over the years, and it always fascinates me how you can adapt a tool for some use other than what it was originally intended. One of my most valuable tools that I use regularly for mounting prints is a common Sewing Gauge. If you are a seamstress you probably know what this is used for. I had to look it up to find exactly what it was called. I just knew this would be something that I could use and it has proven invaluable to me.
I have used a six inch Sewing Gauge for years when mounting prints. I picked up several of these at a garage sale years ago and they are excellent for aligning prints on the mount. The sliding measuring guide is great to check, and double check, the edges of a photograph to be sure it is centered and aligned to the edge of the mat board. I have used a Zone VI Dry Mount Jig for many years, but I have also used two Sewing Gauges as a second check for proper alignment.
[nggallery id=18]
The typical Sewing Gauge is six inches in length and the movable guide will go from a depth of about 1/8 to 5 inches and is used to mark hems and make alterations. You can probably find these in even longer lengths. Take a look on line, or go by your local sewing retailer. They are not expensive and are really near worth their weight in gold. . . well. . . almost!
JB
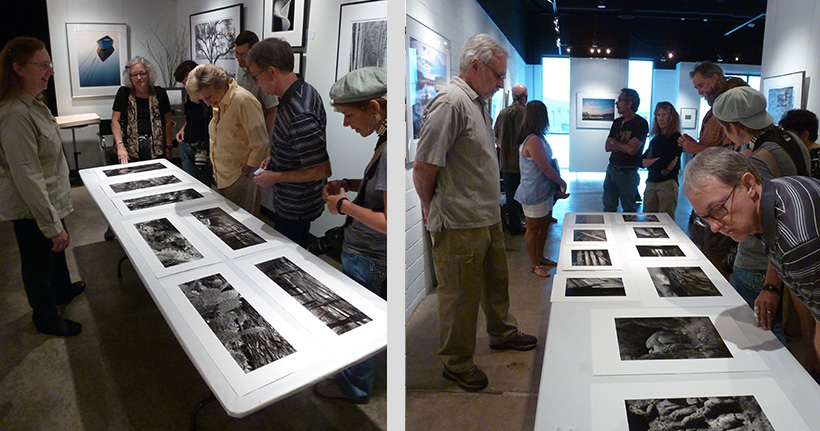
 John Sexton and his wife Anne Larsen are coming to Dallas this September. They are having a two-person exhibition of their photography at Sun to Moon Gallery. The show will run from September 5 to October 12, 2013. John will be giving a lecture at Richland College Saturday, September 7 at 1:00 pm. Later that evening there will be the opening reception for their two-person exhibition at the Sun to Moon Gallery from 5:00 to 8:00 pm. Both of the events Saturday are open to the public.
This should be a very informative and entertaining event. Susan and I are looking forward to catching up with John and Anne. If you are truly interested in photography, you should mark your calendar and make plans to attend. For more information, take a look at these links;
http://www.suntomoon.com
http://www.johnsexton.com
http://www.richlandcollege.edu/photography/events.php
JB
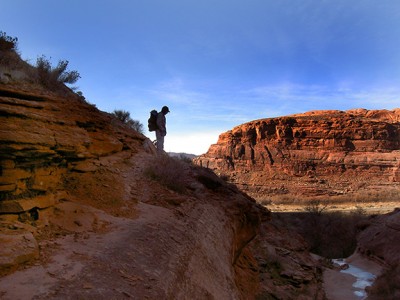
 Brett Weston is credited with saying, “Anything more than 500 yards from the car just isn’t photogenic.” That is particularly true when you enter the world of Large and Ultra Large Format. I would even venture to say that distance shortens exponentially as the camera size increases. You could say that distance is inversely proportional to size. We live by these laws of physics and it is darn hard to get around them.
I have given this a lot of thought and have deduced that;
1. The camera folded size is determined by the film size
2. The camera weight is determined by design and materials
3. My back can only carry so much
So, it is pretty clear that item number one is fixed and there is not much you can do to make any format camera much smaller in size. Also, my back has its load limit and that I do not want to exceed. This leaves item number two as about the only place you can experiment.
It is understood that making any mechanical device lighter makes it less rigid. You have to sacrifice some rigidity for a reduction in weight and size. There is always someone that starts complaining about how some cameras are not rock solid when they grab one end and twist. They complain about the camera not being stable. The reality is, it is just a function of the design. I always say the same thing, the camera only has to be still while the shutter is open. The rest of the time, who cares? The camera is just a tool and should not be obsessed over. Choose what works best for you.
 Way back when I first started getting serious about photography I decided to buy a new 35mm camera. I did a lot of research and settled on three major brand names. The trouble was, I could not decide which best suited me. I knew that there would be no appreciable difference in the finished print. I challenge anyone to look at a framed print on the wall and tell me what brand of camera was used.
So, it all finally came down to making a decision. After some contemplation I decided to go to the local camera store and handle each camera. Actually I had done this several times, but what I was looking for as I neared my final decision, was which best fit my hands. My final choice was based on this one final criteria. I chose the camera that felt the most comfortable to me. Its controls were conveniently laid out and worked seamlessly. This is how I chose and I have never regretted that process.
Fast forward to today and little has changed with my thought process. I am always looking for what best fits my hand and my way of working. In any device design there are always trade offs. To gain one feature may require some sacrifice in another. Keep in mind that if you are going more than 500 yards with that LF or ULF camera, item number three above just may be the most important consideration.
JB
 I find it odd that when you tell someone you are a photographer they immediately assume you are the local Olan Mills studio operator. They either want a family portrait or have a daughter that is getting married and want to hire you. I guess there is a mass disconnect when it comes to the word photographer. Should I introduce myself as a Fine Art Photographer?
Maybe Fine Art Photographer is a little too stiff for an opener. Perhaps it would be better if I told people I am a photographic artist. That should throw them into a tailspin. Or should I start off by saying I am a photographer that does not work with people? I seem to face this dilemma at times and it is hard to convince some that I only shoot rocks and trees. Should I ask a person if they have some interesting rocks or trees in their back yard that they would like me to photograph? How about a nice 11×14 contact print of that old barn out on granddad’s old farm?
I am not out to offend anyone. I have no need to place myself above any portrait photographer, it is that I just don’t do people. It takes a special kind of person to coax out those really interesting images of a person. The knack of catching that expression just so. I’m no good at it and I will be the first to admit that to anyone.
I don’t like photographing anything that moves. I hate the wind. Seems every time I find something really interesting and I check and see the wind is absolutely calm. . . well. . . you know what happens. You get the camera all in place, pull the slide, get the shutter release in hand and there is just this little hint of a breath of moving air. Just enough to make some little feathery leaf or weed wiggle. I shoot with big cameras. An 8×10 is my every day shooter. I shoot with very small apertures and very long exposure times. If anything I have chosen to be perfectly sharp moves, I have just wasted a sheet of film. Depth of field is very scarce. How do you get someone to not move a muscle? Guess if I were photographing people I would be best suited to work with the dead. Would that suffice as an inanimate object?
So for those of you that are not familiar with Fine Art Photographers, the next time someone tells you they are a photographer, be sure to ask first if they do people. Don’t just assume that photographer translates to Olan Mills Portrait Studio.
JB
 Have you ever wondered what the life of an artist would be like? Edward Weston was not only an artist, he was obsessed by his art. Every day before everyone else was awake, Edward would write in his Daybook. His journal has become a classic of photographic literature. At one point he destroyed some of his daybooks, but those that remained were eventually transcribed and published.
Weston was a towering figure in twentieth-century photography, whose restless quest for beauty and the mystical presence behind it resulted in a body of work unrivaled in the medium. John Szarkowski observes that “It was as though the things of everyday experience had been transformed… into organic sculptures, the forms of which were both the expression and the justification of the life within… He had freed his eyes of conventional expectation, and had taught them to see the statement of intent that resides in natural form.”
This is a fascinating and informative read. A look into the life of a dedicated artist. If you are serious about your photography. . . if you think you are serious about your photography. . . read “The Daybooks of Edward Weston” and see how you compare.
JB
 Mixing our own darkroom chemistry has become the established method around here. Since the demise of Zone VI chemistry, we are pretty much on our own when it comes to processing chemistry. Things like PyroCat-HD can easily be mixed by weighing out the necessary materials each time, since you are mixing stock solutions and it is not something you have to do every time you process film. I mix up the print developer as two stock solutions that are combined when a printing session starts. I keep one and two liter bottles of part A and B mixed and ready to go. That is just another element of the process. On the days we are not doing darkroom work, I am in there cleaning and mixing solutions.
 I had written earlier about the demise of Zone VI chemicals and how it has now become necessary to mix our own chemistry from raw supplies. Take a look at the previous post titled, “ROLLING YOUR OWN FIXER.” Since that post I have done quite a bit of research and testing. I am convinced that the fixer formula we chose is not exactly a direct replacement for the old reliable Zone VI product. Not that what we have been using is not a good fixer, it just is not the same. Fred always said, “Different is not the same.”
I have mixed up several concoctions, but have always come back to the Looten Acid Fixer for its simplicity and close match of pH. I kept bypassing some of the more well known formulas for some reason, possibly because everyone says they have a very unpleasant odor. I don’t believe any could be any worse than the Looten Acid Fixer we have been using. . . this stuff will take the hair out of your nose.
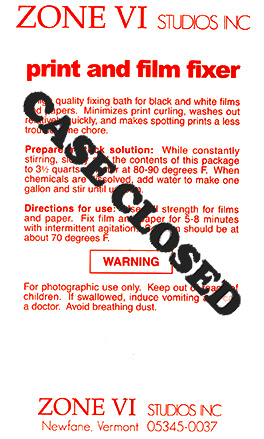
I want to use an acid fixer for paper, because that is what I have used for years. All I wanted to do was find a 100% replacement for the Zone VI Fixer I have used for as long as I can remember. Zone VI Fixer was stable and it had little to no odor. I have searched all over and have never found the exact published formula used by Zone VI.
I looked through all of the old Zone VI Newsletters and finally resorted to watching the Picker videos. Finally in the printing video Fred talks about his fixer being Kodak F-6. The only problem is that the Zone VI Fixer I have used for years always came in a single bag as dry chemical. If you check the formula for F-6 you will find it contains 28% Acetic Acid. I am no chemist, but as far as I know, 28% Acetic Acid only comes in liquid form. Plus, F-6 is a hardening fixer. I have no reason to believe that Zone VI is a hardening fixer, let alone all instructions for F-6 say that the hardener, Potassium Alum, must be dissolved separately and added after all other ingredients have been completely dissolved. Again, the Zone VI Fixer came in one bag containing only dry chemical. So, I really do not believe that F-6 is the correct formula for what was sold as Zone VI Fixer.
There are a lot of guesses, but I do not want a guess. I measured the pH of Zone VI Fixer to be 5.5. None of the other concoctions that I have tried matched this pH, nor did they lack a strong odor. My original choice of Looten Acid Fixer had the closest pH coming in at 5.0, but has a strong odor, where the Zone VI Fixer has little odor at all. I still found myself going in circles.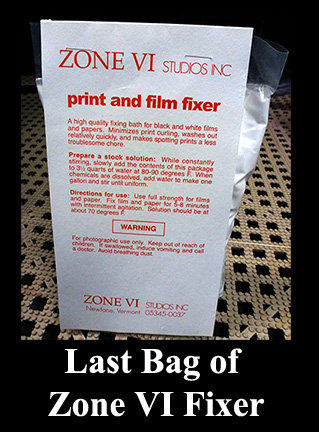
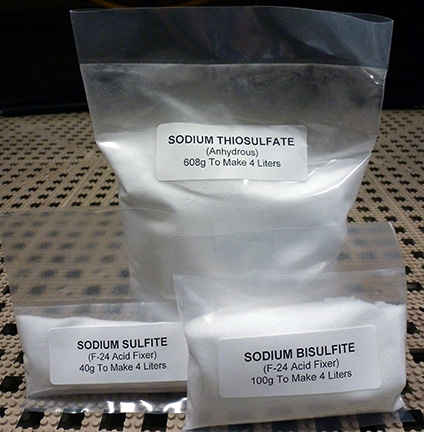
I finally got tired of having to run the vent fan on high to get away from the smell. Time to put on the apron, roll up the sleeves, and do more research. This time I decided to investigate the Kodak F-24 formula. Why I bypassed this one before is beyond me, but I did, and it was a mistake. There is an alternative mixture that is suppose to be ‘low-odor’ that substitutes Citric Acid for the Sodium Bisulfite of the original Kodak formula. This mixture still had a very strong smell. So much for the alternative, low-odor mixture!
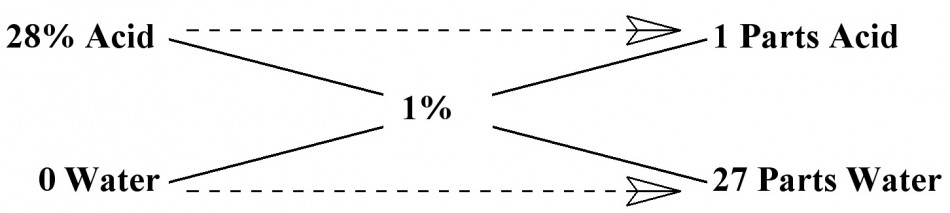
Next, I mixed up a two liter batch of the original F-24 formula, and surprise. . . it smells just like Zone VI Fixer. Next to no odor at all. I measured the pH. . . well whaddya know. . . it was exactly 5.5, just like Zone VI. Next I needed a stability test. I put two liters of F-24 in a four liter jug and let it set for a week. No change! That does it for me. So far as I am concerned, there is no difference.
Wow! Have I solved the great mystery? Could it be that Zone VI Fixer is nothing more than Kodak F-24? I have changed our FORMULAS AREA to reflect the formula for F-24 Fixer since it is now our chosen formula for paper. Note, that the only difference in the new formula is the addition of 10 grams of Sodium Sulfite per liter to the original Looten Acid Fixer formula. Not that difficult, but it does make a difference. Even if F-24 is not the exact same formula as Zone VI, it is plenty close enough for me. I will add that Gordon Hutchings also recommends F-24 for film and paper in “The Book Of Pyro.” So, now you know what I have learned about fixer.
There is one more thing to be aware of; be very careful with the temperature of the water when mixing Sodium Thiosulfate. The most common Sodium Thiosulfate is the Pentahydrate (crystalline type) which requires 240 grams per liter. You need water at about 100-125°F, because it is extremely endothermic and will rapidly cool the water as it dissolves. This I knew from experience. What I didn’t know is that Sodium Thiosulfate Anhydrous (fine grain like table salt), which requires 152 grams per liter, should never be mixed in water above 90°F, because it will decompose and form a precipitant. Just so you know, if using Sodium Thiosulfate Pentahydrate (large crystals) use hot water. If you are using the Anhydrous (fine grain) type, mix at about 80-85°F.
CASE CLOSED. . . at least for me. I have found what I was looking for. If you were a Zone VI Fixer user and are looking for a suitable, easy replacement, this should work just fine. Now, back to making photographs. . . and. . . I can turn that vent fan down to low again!