Fine Art Photography

IS A PYRO FILM DEVELOPER RIGHT FOR YOU?

Pyro Staining Developers

The first time I used pyrogallol was unforgettable. During lunchtime on a hot summer day in 1970, I left work and climbed a hill nearby to expose some test negatives. That evening, I tray processed the 4×5 Plus-X in Kodak D-1, a classic version of “ABC Pyro.” When I turned on the light, what I saw made my heart pound. The negatives were beautiful: tones were spectacularly differentiated throughout the density range, especially in the highlights. And what sharpness! I knew I’d finally found my developer.*
-John Wimberly-

I believe that an artist is never satisfied. As photographers, we all started somewhere. For me it began many years ago; more than I care to count. I can remember when it was a thrill, almost magic, to just get something from the camera to a finished print. My early attempts now do not excite me that much but they were where I started and I cannot deny my vision and skills have changed over the years. My wife and I have continued to hone our photographic vision and skills and we continue to evolve. The journey through creativity is never ending.

So, what does this all have to do with developers? Film, camera, lenses, chemicals and process are all only a means to the end product; the finished print. Each item alone may or may not be of major significance, but everything plays a roll all the way to the end. For many years we used Kodak HC-110 film developer. I fine tuned the developing times and even had my own dilution that I called Dilution JBH. We have hundreds of LF and ULF negatives processed in HC-110. This is about the best film developer you can use if you are just starting out. I am not a practitioner of the film of the month club nor the developer of the month club either. I believe you choose carefully, then spend your time wringing everything you possibly can from your choices. But, as I say, an artist is never satisfied. There is always that little something more.

This drive for continually progressing forward is what led me to begin exploring Pyro developers. I did a lot of research. We both did a lot of real-world testing, using numerous Pyro film formulas. This quest turned into several years of experimentation, but we both feel we learned a lot and did find that little something extra. We both agree the effort was well worth the time we invested.

Pyro film developers are different. Though the difference is very subtle and really cannot be fully appreciated unless you have some experience with the more traditional developers. I would never recommend that a newcomer to film photography start with a Pyro developer. You need to refine your skills first with a non-staining developer, so you will see the minute differences a Pyro developer creates.

JB

* “PyroTechnics Plus: Formulating a New Developer” by John Wimberly, Photo Techniques Magazine, March/April 2003, p.34-37

Posted by JB Harlin in Darkroom, Film, How-To, Photography, The Darkroom Workshop

FROM THE ROAD; 2017 TRIP TO UTAH

FROM THE ROAD

We have returned home from another trip photographing in Utah. We did come home a couple of days early due to impending winter weather here in Texas. It was near warm out West, while everything from Texas Eastward was in the deep freeze. We did have an excellent trip and we had an amazing time finding new things and making new photographs of some of our favorite places.

Here are a few statistics from this year’s trip:

DAYS ON THE ROAD TOTAL: 29
DAYS IN BRYCE CANYON NP: 3
DAYS IN SPRINGDALE, UT: 16
DAYS IN MOAB, UT: 5
NUMBER OF DAYS PHOTOGRAPHING: 16
SUSAN 4X10 FILM: 87
SUSAN 8X20 FILM: 7
JB 8X10 FILM: 67
JB 11X14 FILM: 12
TOTAL MILES DRIVEN: 3,745

It will take us some time to get the film processed, sorted, filed and proofed. Hopefully we brought back more interesting photographs to print. We invite everyone to follow us on our Web Site, our BLOG and FaceBook. For those of you that traveled with us and followed our ‘FROM THE ROAD’ 2017 emails, thanks for traveling with us! We have gathered all of the emails into a PDF you can view here:

FROM THE ROAD 2017

Hope you enjoyed traveling with us, it is always fun sharing the ‘From the Road’ updates.

JB & Susan

Posted by JB Harlin in Film, Photography, Travel

Print Your Legacy – John Sexton

I believe that every photographer, regardless of your skill level, chosen format or commitment to the medium, should watch this and listen carefully to what John Sexton has to say.

You can find more videos from other photographers on the Epson Print Your Legacy web site.

All I can add is: Don’t forget to Make Prints!

JB Harlin


Posted by JB Harlin in Commentary, Darkroom, Photography

THANKS EVERYONE FOR COMING OUT!

We would like to thank everyone that attended our presentation last Thursday evening at the DCP.  We had an energetic group of photographers and photography enthusiasts.  A special thank you to the DCP for including us in their 2017 DCP Speaker Series, the Texas Photographic Society and Frame Destination!  Here are a few photos from the evening courtesy of Courtney. . .

JB & Susan


Posted by JB Harlin in Events, Film, Photography, Presentation

DCP SPEAKER SERIES; 04/20/2017

Hello Everyone;  Mark your calendar for April 20, 2017 and join us at the DCP for an evening of traditional photography.  We will be giving a talk titled “FULLY COMMITTED:  MARRIED TO THEIR CRAFT AND EACH OTHER.”  We will also have cameras and associated gear, along with a few original photographs on display.

DALLAS CENTER FOR PHOTOGRAPHY


DCP SPEAKER SERIES

Looking forward to seeing you at the DCP!

JB & Susan


Posted by JB Harlin in Events, Film, Photography, Presentation, Travel

FROM THE ROAD; OUR 2016-2017 UTAH TRIP

FROM THE ROAD; OUR 2016/17 UTAH TRIP

We did come home. . . again. . . after a great trip to Utah!  The last week has been filled with trying to find things again, put stuff up, do laundry and just decompress from a month on the road.  It is always extremely exciting to take a trip, yet it is always good to be home!

Here are some of the details from this year;

DAYS ON THE ROAD TOTAL:  30
DAYS IN BRYCE CANYON NP:  3
DAYS IN SPRINGDALE, UT:  15
DAYS IN MOAB, UT:  8
NUMBER OF DAYS PHOTOGRAPHING:  19
SUSAN 4X10 FILM: 102
SUSAN 8X20 FILM: 5
JB 8X10 FILM: 65
JB 11X14 FILM: 17
JB 16X20 FILM: 4
TOTAL MILES DRIVEN:  3,791

It will take us some time to get the film processed, sorted, filed and proofed. Then we will begin to sort through what we have and the process of printing will begin. We invite everyone to follow us on our Web Site, our BLOG and FaceBook. Also, we have gathered the entire ‘FROM THE ROAD’ 2016-2017 email collection into a PDF for those that were not on the mailing list. You can view the entire trip mailing in PDF format here;

FROM THE ROAD 2016-2017

We would like to thank everyone on our mailing list for sticking with us on this trip. It has been fun doing the ‘From the Road 2016-2017’ updates and we hope everyone enjoyed riding along with us.

JB & Susan


Posted by JB Harlin in Photography, Travel

8X10 LED VC ENLARGER HEAD

8x10 LED VC Control Head
There are always those projects that you really want to undertake.  But there is sometimes hesitation due to doubt as to the feasibility, or maybe the availability  of the needed technology at the time to make the idea reality.  Here is one of those projects that has been in the pipe, yet on the back burner, for quite some time.  There were doubts as to whether this one would work.  What the heck am I talking about. . . OH. . . that?

We finally committed to doing the research and development of an LED VC head for the 8×10 enlarger.   This one took some time for research, design and testing, but it is finally a reality.  Want to read about what it took to build a working 8×10 LED VC enlarger head?

Look in the Articles Area of our web site for the story or, here is the direct link to the PDF ”

DESIGNING & BUILDING AN LED VC ENLARGER HEAD.”


Posted by JB Harlin in Darkroom, DIY, How-To, Photography

ZONE VI; THE END

Zone VI Print Developer
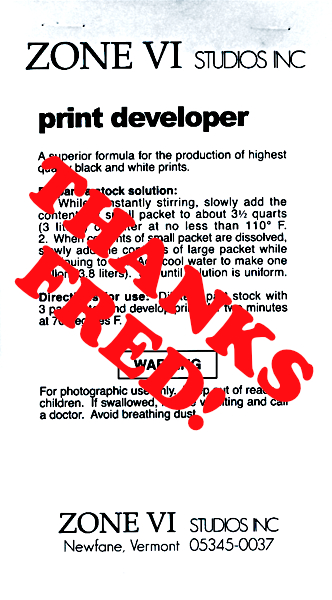
It has finally happened!  I have used Zone VI chemicals for well over twenty five years now.  Though we have moved on to different formulations for finished prints, we have continued to use Zone VI Print Developer for proofing.  That is. . . until now.   I mixed the last bag for proofing our 2015/2016 trip and that is that.  This has been a looming change that has been in the back of my mind for several years now and it finally came time to do some testing.  OH Drat. . . TESTING!!!

Remembering a conversation from years back someone, somewhere, said that Zone VI Print Developer was just D-72. . . or maybe Dektol?  There is one sure fire way to find out. . . “TRY IT” as Fred would say.  And that is exactly what I did.

I mixed a liter batch of D-72 and used the last of the Zone VI Print Developer in a side-by-side test.  First I exposed two sheets of our proofing paper, set to Grade #2, to a Stouffer 21-Step Wedge.  Processed one sheet in each developer and finished as usual.  Both developers were diluted 1:3, all temperatures were matched and the Zone VI Compensating Developing Timer was used on each.

After the test sheets were dry, I measured them with an XRite 810 densitometer and plotted the curves with the BTZS Plotter app.  I knew from the numbers they would be a near match and the resulting graph shows very little difference.   That pretty much settled that.  (NOTE:  In the plot, the black line is D-76 and  the red is Zone VI.)

D-71 vs Zone VI Graph
There was only one more test required to convince me, and that was making a real proof.  I chose a familiar negative and exposed two more sheets of paper using this negative.  Each sheet of paper was developed in the same fashion as the step wedge prints and finished as usual.  The two proofs were a near identical match.  The Zone VI was very slightly less contrasty, but that could have been due to the fact that the developer was old.  The main thing I was looking for was to be sure the color of the two proofs were the same.  They are, to my eye at least, exactly the same color.  (NOTE:  The proofs below, on the left is the D-72 and on the right is the Zone VI.)

All that was left to do was to make a new paper grade test to confirm the enlarger VCCL settings required to print a grade #2 and that was the end of the testing.

FYI;  Here is how to calibrate a VC enlarger, “USING BTZS TO CALIBRATE A VARIABLE CONTRAST COLD LIGHT” originally published in the Sep/Oct 2007 issue of View Camera Magazine.  I have added the formula for D-72 to the FORMULAS area of the jpbhphoto.com BLOG.

Zone VI & D-72 Proofs
It’s a sad day but finally Zone VI, as a supplier of darkroom chemistry for us, is gone forever.  The good news is, it is possible to mix your own developer and achieve the same results that we have become accustom to over the years.  Proper proofing is the control and the verification that your technique is working as you think it should.  It is important to keep the proofing process as consistent as possible.  I believe we are good to go without Zone VI now.  Thanks Fred for all you did for traditional film photography!

JB


Posted by JB Harlin in B&W Paper, Darkroom, Photography

TIME FOR A CHANGE & A NEW TRIPOD BOX

We decided to retire our 2006 Chrysler Town & Country minivan this year and move into something a little bigger for road trips.  This minivan has served us well for the last ten years.  It has traversed from the Pacific to the Atlantic coasts. . . more than once.  But, there comes a time when you need to look into making changes.  We have loaded this little Town & Country and the previous Plymouth Grand Voyager to the hilt and trekked off on road trips many times.  But, there comes a time when you need to reassess the situation.

We have worked out a loading scheme that allows us to carry the main cameras we use, but there is more!  I have not hauled the 16×20 camera in near 10 years now.  It is just too much to fit into a minivan.  Seeing how our Town & Country is now 10 years old and just turned over 100k miles, we started thinking about something new.

It has taken 3 months of research, a lot of looking and just thinking about what our traveling goals really are.  We wanted something a bit larger, without all the fluff of computed-out over the top luxury vehicles, like the current minivans all seem to be obsessed with.  What we wanted was a TRUCK!  We looked at a pickup with a topper, but that did not suit our goal.  Everything we found in a van was either massively big, or ridiculously small.

On the last trip to Utah we had the opportunity to see a lot of rental vehicles on the road and in the parks.  That along with a lot of searching the Internet, it was becoming obvious we were not finding anything that would work for us.  Near giving up, on a day lost to rain in Springdale, UT, I found something searching the Internet one more time.  There is one vehicle that fit between too much and too little.  More research, and then a visit to a dealer, after we returned home, pretty much sold us on the idea that we had found a vehicle that would work well for us.

We finally settled on the Nissan NVP 3500 12-passenger van.  This is a relatively new vehicle, just going into production in 2012.  The NV is basically a Nissan Titan truck built into a van.  They have several models that are sold with no interior for work trucks.  But, Nissan did something that makes real sense.  They build a passenger model, with full interior and seating for 12 people.  We drove one and decided this, minus the seats, would be just fine for us.

The NVP has become very popular with large families and are somewhat hard to find. . . at least if you want a particular color or configuration.  We made a request for what we wanted and sure enough, the salesman found one and had it brought in for us to see.  That did it. . . Sold!

We spent a few hours at the dealership and brought the blue NVP home.  First order of business. . . remove the seats.  They are removable and are just latched to the floor.  Into the storage barn they went.  Next we needed to build a new tripod box.  Took a little time and some CAD work to come up with a new box and a way to get it mounted to the floor.  Had to design a mount that would attach to the factory seat hold downs in the floor and then build a new box to hold four tripods.  

Some plywood, some glue, some aluminum bar stock, a few dozen deck screws, assorted hardware, sawing, machining and finally a luxurious covering with speaker carpet and there you have it.  The tripod box is installed and ready for the road.  Now we need to get out. . . and yes the 16×20 will be back on the road!

And not to forget the 2006 T&C. . . we removed the tripod box that has been in it for the last ten years and put the factory seats back in.  It now looks just like it did when we first got it.   The 1999 Plymouth Grand Voyager with near 170k miles had to go and was sacrificed as the trade-in.  

Yes. . . it is Time For A Change!

JB


Posted by JB Harlin in Photography, Travel

THANK YOU, EVERYONE!

Susan and her 4x10 Zion NP

Susan and her 4×10, Zion NP


We spent the greater part of last December traveling in Southern Utah.  We visited Bryce Canyon NP, then traveled to Zion NP and the area surrounding Springdale.  Next we ventured to Moab, where we visited Arches NP and Canyonlands NP.  Hope everyone enjoyed our random From The Road emails and thanks for traveling along with us!  We will put up a travel album on our web site as soon as we get a little time.

Don’t forget the selfie!  That seems to be the latest fad and though irritating at times, the preverbal ‘selfie’ has its appeal.  We are no different, I guess.  We did make a few obligatory selfies on our last trip.  Saw a few people with those selfie sticks. . . some were pointed out car windows or an open moon roof while driving.  Really wonder what kind of images they got?  Having said all that, and not to be out done, we include a few here for your viewing pleasure. . .

Needless to say, we have quite a bit of film to process and that will take at least another month before we begin to see what we brought back.  In a world of instant gratification (keep that selfie stick out of my face!), there are those that can’t understand how anyone could be that patient.  This is one of the greatest attributes of LF and ULF film photography.  It teaches you patience.  You take your time when finding a subject.  You spend even more time composing the image.  Making that exposure is a one time thing.  You make sure. . . then you make doubly sure, before you expose that one sheet of film.  You know that you will not even get an inkling of what you captured for quite some time, so you give it your best and hope what you do pays off.

We continue to follow our passion for LF and ULF film photography and do send our deepest heart felt thanks to everyone for your continued support.  Each year there seems to be more and more interest in film and is extremely encouraging.  Happy New Year to all.  Hope everyone has a great 2016!

Agin, Thank You Everyone!

JB & Susan


Posted by JB Harlin in Film, Photography, Travel