It is really great to be able to fix, repair, and restore your equipment yourself. I have always been a doer. . . I like to maintain and work on my own equipment when I can. On our last trip to Utah I noticed that my very old and trusty Ries ‘A’ Model tripod was beginning to show signs of use. I have no idea how old this one is, but I would guess it was manufactured in the late 1970’s or so. I have had it for years and it was no where new when I purchased it. The legs have taken a beating, needed a little work and a refinish. The top crown paint was chipped and peeling and the previous owner had not used a friction washer between the head and the crown, so the crown top was pretty scared up and needed some attention also.
What I had in mind was a complete strip down of every part of the tripod, remove all old paint and finish, repair dings and dents as best as possible, refinish everything, then reassemble. It’s not that hard to dissemble a Ries tripod. Take care not to damage anything and maybe take a few quick snapshots before you start, just in case you don’t remember exactly how it all fits back together.
I completely disassembled the legs, removing all of the hardware so I could sand and refinish the wooden legs. The most difficult things to remove are the drive pins that hold the leg locking rods to the underside of the crown and leg swivel guides. An appropriate size punch makes short work of the pins and an arbor press takes care of the guides.
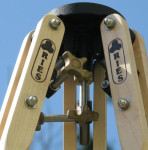
At this point I have the entire tripod completely disassembled. With the application of a little elbow grease, I completely sanded down all of the wooden leg parts, smoothed over the dings, scrapes, and dents, and shot three coats of spar varnish on all six upper and three lower legs. Next I stripped the old paint from the tripod crown. Took a few tries and some scrubbing with a brush, but soon I had nothing but bare aluminum. Since the crown top surface was scored, I chucked the head in the lathe and resurfaced the top. Next came a fresh coat of black self-etching primer and a bake in the sun for a day. There is nothing like a day or two in the Texas sun to really cure paint. . . even in winter.
The leg swivel guides did not fare well being removed from the crown, so I machined a new set. Once I had the new guides pressed into the crown I also made a new set of friction washers.
At this point it was just a matter of cleaning up a few odd parts and reassembly of the entire tripod. I did not need to do any work on the A250 head since it is much newer than the legs so it was only a matter of adjusting the leg tension and my tripod was ready for action.
That is the entire process in a nutshell. The tripod, though it will never look factory new, is now ready for another trip.
JB
 What are you looking for? A new camera? Pieces and parts? A new lens? We are cleaning out our equipment closet and it is time for some things to go to someone that can use them. The excess equipment we no longer need may be just what you are looking for.
Drop by the new area on our web site FOR SALE and take look. There just may be something you really need. And you will be helping us with our spring cleaning!
JB

 Susan and I are honored to have been chosen to be two of six judges for the first Ries Photo Contest sponsored by Ries Tripods. The sponsors hope to make this an annual event and that all depends on you entering your photographs. The theme of this contest is “HANDS” and is open to artistic interpretation.