Darkroom

IS A PYRO FILM DEVELOPER RIGHT FOR YOU?

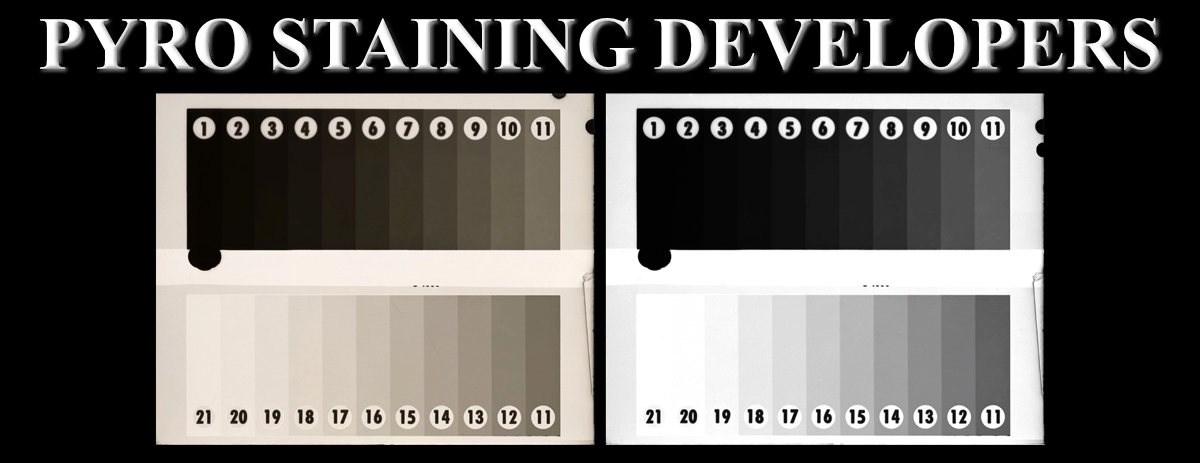
Pyro Staining Developers

The first time I used pyrogallol was unforgettable. During lunchtime on a hot summer day in 1970, I left work and climbed a hill nearby to expose some test negatives. That evening, I tray processed the 4×5 Plus-X in Kodak D-1, a classic version of “ABC Pyro.” When I turned on the light, what I saw made my heart pound. The negatives were beautiful: tones were spectacularly differentiated throughout the density range, especially in the highlights. And what sharpness! I knew I’d finally found my developer.*
-John Wimberly-

I believe that an artist is never satisfied. As photographers, we all started somewhere. For me it began many years ago; more than I care to count. I can remember when it was a thrill, almost magic, to just get something from the camera to a finished print. My early attempts now do not excite me that much but they were where I started and I cannot deny my vision and skills have changed over the years. My wife and I have continued to hone our photographic vision and skills and we continue to evolve. The journey through creativity is never ending.

So, what does this all have to do with developers? Film, camera, lenses, chemicals and process are all only a means to the end product; the finished print. Each item alone may or may not be of major significance, but everything plays a roll all the way to the end. For many years we used Kodak HC-110 film developer. I fine tuned the developing times and even had my own dilution that I called Dilution JBH. We have hundreds of LF and ULF negatives processed in HC-110. This is about the best film developer you can use if you are just starting out. I am not a practitioner of the film of the month club nor the developer of the month club either. I believe you choose carefully, then spend your time wringing everything you possibly can from your choices. But, as I say, an artist is never satisfied. There is always that little something more.

This drive for continually progressing forward is what led me to begin exploring Pyro developers. I did a lot of research. We both did a lot of real-world testing, using numerous Pyro film formulas. This quest turned into several years of experimentation, but we both feel we learned a lot and did find that little something extra. We both agree the effort was well worth the time we invested.

Pyro film developers are different. Though the difference is very subtle and really cannot be fully appreciated unless you have some experience with the more traditional developers. I would never recommend that a newcomer to film photography start with a Pyro developer. You need to refine your skills first with a non-staining developer, so you will see the minute differences a Pyro developer creates.

JB

* “PyroTechnics Plus: Formulating a New Developer” by John Wimberly, Photo Techniques Magazine, March/April 2003, p.34-37

Posted by JB Harlin in Darkroom, Film, How-To, Photography, The Darkroom Workshop

Print Your Legacy – John Sexton

I believe that every photographer, regardless of your skill level, chosen format or commitment to the medium, should watch this and listen carefully to what John Sexton has to say.

You can find more videos from other photographers on the Epson Print Your Legacy web site.

All I can add is: Don’t forget to Make Prints!

JB Harlin


Posted by JB Harlin in Commentary, Darkroom, Photography

8X10 LED VC ENLARGER HEAD

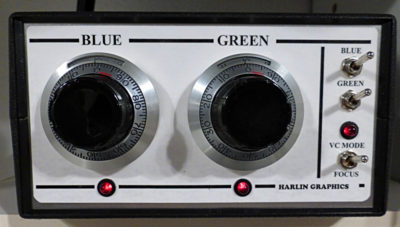
8x10 LED VC Control Head
There are always those projects that you really want to undertake.  But there is sometimes hesitation due to doubt as to the feasibility, or maybe the availability  of the needed technology at the time to make the idea reality.  Here is one of those projects that has been in the pipe, yet on the back burner, for quite some time.  There were doubts as to whether this one would work.  What the heck am I talking about. . . OH. . . that?

We finally committed to doing the research and development of an LED VC head for the 8×10 enlarger.   This one took some time for research, design and testing, but it is finally a reality.  Want to read about what it took to build a working 8×10 LED VC enlarger head?

Look in the Articles Area of our web site for the story or, here is the direct link to the PDF ”

DESIGNING & BUILDING AN LED VC ENLARGER HEAD.”


Posted by JB Harlin in Darkroom, DIY, How-To, Photography

ZONE VI; THE END

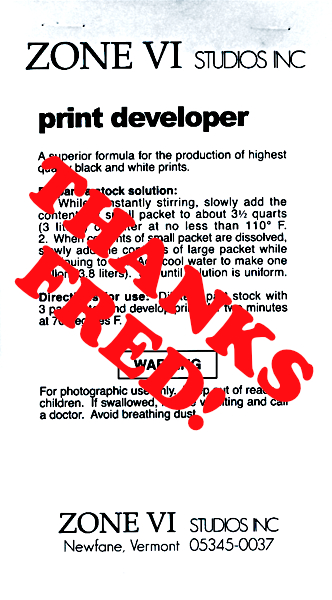
Zone VI Print DeveloperIt has finally happened!  I have used Zone VI chemicals for well over twenty five years now.  Though we have moved on to different formulations for finished prints, we have continued to use Zone VI Print Developer for proofing.  That is. . . until now.   I mixed the last bag for proofing our 2015/2016 trip and that is that.  This has been a looming change that has been in the back of my mind for several years now and it finally came time to do some testing.  OH Drat. . . TESTING!!!

Remembering a conversation from years back someone, somewhere, said that Zone VI Print Developer was just D-72. . . or maybe Dektol?  There is one sure fire way to find out. . . “TRY IT” as Fred would say.  And that is exactly what I did.

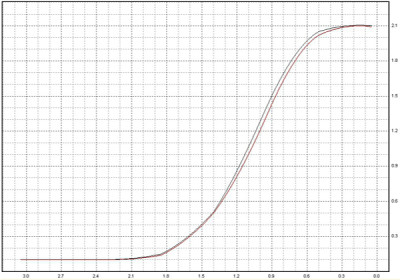
I mixed a liter batch of D-72 and used the last of the Zone VI Print Developer in a side-by-side test.  First I exposed two sheets of our proofing paper, set to Grade #2, to a Stouffer 21-Step Wedge.  Processed one sheet in each developer and finished as usual.  Both developers were diluted 1:3, all temperatures were matched and the Zone VI Compensating Developing Timer was used on each.

After the test sheets were dry, I measured them with an XRite 810 densitometer and plotted the curves with the BTZS Plotter app.  I knew from the numbers they would be a near match and the resulting graph shows very little difference.   That pretty much settled that.  (NOTE:  In the plot, the black line is D-76 and  the red is Zone VI.)

D-71 vs Zone VI Graph
There was only one more test required to convince me, and that was making a real proof.  I chose a familiar negative and exposed two more sheets of paper using this negative.  Each sheet of paper was developed in the same fashion as the step wedge prints and finished as usual.  The two proofs were a near identical match.  The Zone VI was very slightly less contrasty, but that could have been due to the fact that the developer was old.  The main thing I was looking for was to be sure the color of the two proofs were the same.  They are, to my eye at least, exactly the same color.  (NOTE:  The proofs below, on the left is the D-72 and on the right is the Zone VI.)

All that was left to do was to make a new paper grade test to confirm the enlarger VCCL settings required to print a grade #2 and that was the end of the testing.

FYI;  Here is how to calibrate a VC enlarger, “USING BTZS TO CALIBRATE A VARIABLE CONTRAST COLD LIGHT” originally published in the Sep/Oct 2007 issue of View Camera Magazine.  I have added the formula for D-72 to the FORMULAS area of the jpbhphoto.com BLOG.

Zone VI & D-72 Proofs
It’s a sad day but finally Zone VI, as a supplier of darkroom chemistry for us, is gone forever.  The good news is, it is possible to mix your own developer and achieve the same results that we have become accustom to over the years.  Proper proofing is the control and the verification that your technique is working as you think it should.  It is important to keep the proofing process as consistent as possible.  I believe we are good to go without Zone VI now.  Thanks Fred for all you did for traditional film photography!

JB


Posted by JB Harlin in B&W Paper, Darkroom, Photography

UPDATE TO FORMULAS

We have just updated the FORMULAS area here on the jbhphoto.com BLOG (click the link at top of the page).  What you will see is mostly cosmetic with a few corrections here and there.  The formatting of the older area was made of screen grabs of notes and was not that well organized.  Hopefully it is now a little more tidy.

Very little changes in the realm of the wet darkroom and film photography.  There are no fads. . . no here today, gone tomorrow. . . no high-tech gadgets. . . no amazing updates.  Traditional film photography is a craft you learn; fine tune; then use.  The bottom line is the finished fine print.  Traditional film photography is very old fashion and grounded in down-to-earth proven techniques, that once learned are the backbone of the art form.  Bottom line; not a lot to stand in line or camp on the street to be the first for some new-fangled gadget or upgrade.  Once you master the technique, there are no excuses not to produce finished work.  Film photography is a craft; you learn it; then you use it; for the rest of your life; and you pass on what you have learned.

In our Formulas area you will find the mixtures we use.  Nothing very special about anything we do, and it would be a good assumption you will see little new there.  Take what you can make work for you; leave anything else for the next interested photographer.

JB

Posted by JB Harlin in Darkroom, DIY, Film, Formulas, How-To, Photography

THOMAS DUPLEX SAFELIGHT & SOX

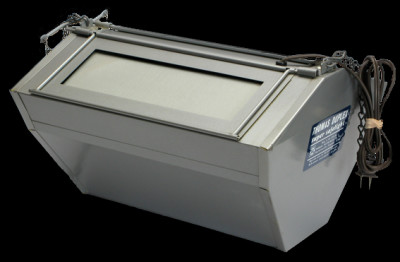
Had an interesting discussion the other day with a group of photographers about the Thomas Duplex Super-Safelight.  This is one of the best safelights you can own.  They are bright, powerful and will fog your paper before you can say Look Out!  Honestly, these things are designed to light a very large darkroom, I would say, far beyond the size that most of us are accustomed to having the privilege of owning.  They come with several glass-mounted filters that are designed for different darkroom uses, but there seems to be a lot of confusion as to what filters to use and how this all works.

So, let’s begin by trying to better understand just how the Thomas Duplex Super-Safelight works.  This is really an ingenious device that uses technology designed for something completely different.  If you have ever looked inside of the unit you will see a strange looking glass lamp.  This is the heart of the Super-Safelight. . . a Low Pressure Sodium lamp. . . designated in the industry as an SOX lamp.  Without getting into a lot of very technical talk, this SOX lamp is an extremely bright light producing device. . . you get a lot of light per watt of electricity used.  But there is a trade-off. . . the spectral output of the lamp is extremely narrow.  In the simplest terms, there is a lot of light, but it is just one color.  How this narrowband light is generated and the details of the lamp itself are way too complicated for this discussion.  For the photographer, how to use the lamp is much more important.  You do not need to know how to build a car from a block of metal to drive it.  If you are really. . . really. . . really. . . interested in the technical stuff, here is a LINK.  Also an Internet search will turn up even more technical info.

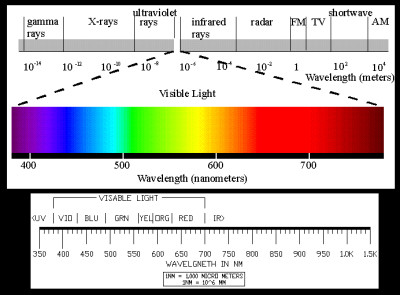
Spectrum

Electromagnetic Spectrum

SOX18

Low Pressure Sodium Lamp

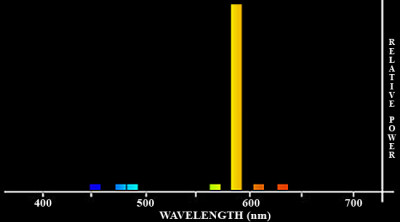
What we photographers are really interested in is the spectral output of the lamp.  The SOX lamp produces a virtually monochromatic light, averaging about 589.3nm wavelength.  I know, more of that technical talk.  What is important to know is that this wavelength of light from the SOX lamp is outside the main spectral sensitivity of B&W printing papers.  This is what makes the Super-Safelight unique.

So, roughly speaking, we can say that graded papers are mostly blue sensitive, and VC papers are mostly sensitive to blue and green light.  Again, roughly speaking, graded papers are mostly sensitive to about 450-500nm wavelengths.  While VC papers are roughly most sensitive to about 400-570nm wavelengths.

Now with a rudimentary understanding of the SOX lamp spectral output, it becomes obvious that it is well suited for use in a photographic safelight.  The thing is, these lamps put out so much light that they are a danger to photographic printing papers.  If you look at the spectrum, you will also notice there are other wavelengths in the blue and near green that can cause fog.  A proper cutoff filter will remove them.

SOX Lamp Spectrum

Spectral output of SOX Lamp

Even with the greatest spectral output beyond the main sensitivity range of the papers, if you expose the paper to too much light you will get fog.  You have to attenuate the SOX lamp output even further.  I have made my own filters for my Thomas Duplex Super-Safelight and it is not that difficult, nor is it expensive.  I have another post on this BLOG that deals with the proper cutoff filter and using ND filters to tame down the light output.  You will find the post titled, “THOMAS DUPLEX SUPER SAFELIGHT FILTERS” contains the details of how to make your own B&W filters.

You will also note in this previous post that I have replaced the lamp in the Super-Safelight we use.  The stock unit comes with a 35 watt (SOX35) lamp, which in reality is way too much light for the small darkroom.  The thing is just way too bright for our darkroom which is 9 1/2 x 16 feet.  Realize that there is no practical way to electrically dim the lamp.  So, I did what I usually do with most everything around here; I looked to modify how it works.

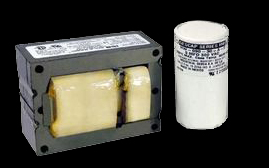
Doing a little research I found that the smallest SOX lamp available was 18watts (SOX18).  That is what I wanted; less wattage; less light!  If you choose to do this, keep in mind that the ballast and capacitor are specific to the lamp.  If you want to change the lamp wattage, you have to purchase the appropriate ballast and capacitor.  If you are not comfortable working with electricity, please ask for help, or do not attempt this.  But, if you decided to move to the lower power lamp, there isn’t much to it.  You simply swap out the ballast, the capacitor and the lamp.

Ballast & Cap

SOX Magnetic Ballast & Capacitor

Using the SOX18 lamp will greatly decrease the light output of the Super-Safelight.  This coupled with the use of the proper cutoff filter and ND filters will allow you to tame the light output to a manageable level in the smaller darkroom.

NOTE:  One more thing; the stock Thomas Duplex Super-Safelight uses the older magnetic ballast and external capacitor.  This is what I used and this was near 20 years ago.  Now you can purchase an electronic version of the ballast but I have absolutely no experience with them, so you are on your own there.

Now you know how the Thomas Duplex Super-Safelight works, and hopefully how to best use it in your darkroom.  Do Not Forget to TEST to be sure your safelight is SAFE!

JB

Posted by JB Harlin in B&W Paper, Darkroom, How-To, Photography

OVER 25 YEARS OF MPD & STILL GOING

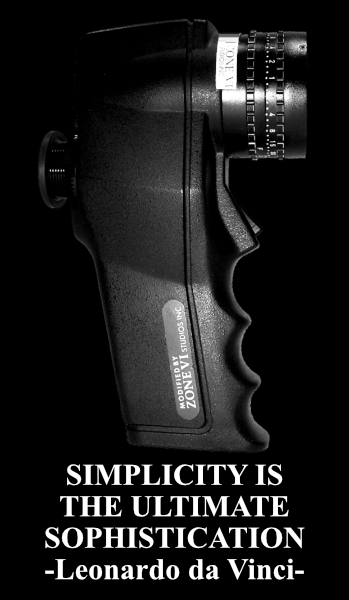
SimplicitySeems everyone has their favorite method for exposing and developing film. You do shoot film, don’t you?  If not, you should!  But I digress for sure. . .  There are as many ways of working with film as there are opinions. . . maybe more.  None are better or worse than any other, if they work; if they give you the results you insist on within your own vision, then you are already there.    But, in this day and age there are a lot of people coming into photography and just now discovering film and the traditional darkroom.  In the beginning film is a mystery and requires some time to begin to master.  Of course, the most important thing is that you shoot film and make finished photographs.  How you get there is a very personal thing and you need to choose what works best for you.  But, you have to start somewhere.

For me, I prefer simplicity when I am out making photographs.  I do not want to get bogged down with a lot of complexity.  I struggled with film exposure and development, like I would speculate that most everyone has when they first start out trying to understand film photography.  It was way back in the mid 1970’s when I realized I could process and print my own photographs.  This was a big deal for me.  It started a lifetime involvement with photography and the wet darkroom.

I stumbled around, trying this and that looking for that magic technique that would give me a negative that would print what I saw in my mind’s eye in the finished print.  I read everything I could find on the subject.  I even toyed with the idea of becoming a strict Zone System practitioner.  Thing was, everything I looked into was just way too complicated.  There had to be a simpler way. . . at least, that is what I thought.

Somewhere in the 1980’s I discovered Fred Picker and his “Zone VI Workshop” book.  This was exactly what I was looking for.  It made sense and contained a simple approach that I found worked!  Having found someone that was also into simplicity, I subscribed to the Zone VI Newsletter.  I remember really getting excited when I discovered the latest issue in the mailbox.  Plenty of opinion and advice that really made sense.  To this day I still have my complete set of these newsletters.  About 25 years ago when I seriously decided to start working with large format photography, I read the entire set again. . . three times. . . every issue, #1 through #83.
MPD; THAT SIMPLE

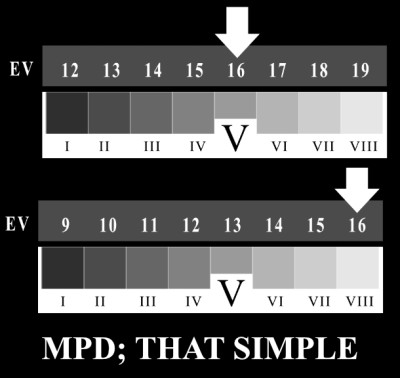
I had experimented previously with what Fred called MPD (Maximum Printable Density) back in my early days in photography.  I had very good results, but I drifted away from the darkroom for a while to concentrate on a career.  When I moved back into photography after a brief hiatus,   I dove right into large format.  I needed to relearn my darkroom skills, at least to the point where I had left off and establish a sound working technique.

MPD is such a simple approach to exposing film that most think it will not work.  It is deceptively simple for sure!  I did some experimenting to get back into the groove and continue my experiments with simplicity.  I found that MPD was just what it claims to be. . . SIMPLE. . . and well-suited for any film format!   I am a big fan of ‘simple’ for sure.  As with anything, it is ludicrous to use something that does not work.  Why make it worse on yourself.  I approached MPD with the idea, that as long as it works, I will use it.

It is funny how there are things that just seem to fit you and continue to do so.  It has been over 25 years now and I still use MPD. Why?  Because it works!  My wife uses it and she is sold on the idea of simplicity also.  If you have seen any of our original prints from LF negatives, you have seen film exposed using MPD.

Oh, guess I forgot to mention exactly how simple MPD is in practical use.  Here goes, don’t blink;  1. Find your subject, compose as you wish.  Not much new there.  But, here it comes.  2. Meter the area you wish to render as a Zone VIII.  White painted wall, snow, sand. . . whatever you wish to print as finely textured white (Zone VIII).  Meter that area.  3. Open up three stops, or place the reading on Zone VIII if your meter has a Zone Dial.  4. Set your exposure and expose the film.

It is actually even easier than that;

1.  Meter

2.  Place VIII

3.  Expose. . .  DONE!

Now, don’t believe this is a haphazard way of working.  First, you must do your film testing.  You need to establish your working EI (Exposure Index) and your normal (N) developing time.  You need to establish a proper proofing regiment.  Your proper proofs are your control.  They tell you just how you are doing with film exposure and developing.  Study your proper proofs and make fine adjustments on the fly.  Thing is, once you find a starting point, things get much easier.  You do not have to engage in never-ending testing.  Test once. . . find that starting point.  As Fred Picker said, “Get one foot on a rock.”  Then you use your proper proofs for fine tuning and a constant check on how you are doing.  Simple!
The Film Exposure Work Book

Are you interested in making really good negatives?  Want to understand proper proofing,   personal film speed and developing times?  How about getting started using MPD?  Interested in getting the technical stuff behind you?

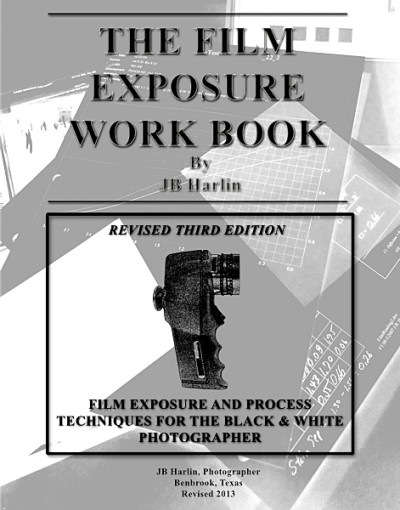
I was asked how to use MPD and what testing was necessary years ago.  I wrote “THE FILM EXPOSURE WORK BOOK” specifically for those interested in learning where to start.  This 44 page book is now available for download in e-book format from our online store.  You will learn how to establish your working EI.  Determine your N and N+1 1/2 developing times.  Proper Proofing is covered and much more.  You will also get a printable 12 page Work Sheet to record your testing results.

Is MPD right for you?  If you are just starting out with film, it just might be if you are interested in a simple, reliable method for making the best possible negatives.  Fred Picker had a large rubber stamp that said TRY IT.  He used it to answer letters people wrote to him asking questions.  You will only know if you TRY IT.  It has worked well here for over 25 years!

JB

Posted by JB Harlin in Commentary, Darkroom, How-To, Photography

LED LIGHTING

We have finally started to transition into the 21st century.  I have been doing research into LED lighting for our darkroom and workroom for some time.  Not because I really care that much about the power use. . . I am more concerned about the useless heat generated by incandescent lighting.  In case anyone has never investigated this, your standard filament-type lamp produces more infrared heat than visible light.  We live in Texas and every bit of heat generated inside has to be pumped out with the A/C system.  Need I say, I really don’t care for hot weather, nor a hot house.

I have been intrigued by LED lighting and I have been following the technology for some time.  Up until recently LED lighting has been very expensive and not all that great as a replacement for the old reliable standard incandescent light bulb.  Cost not being factored in, there was still an issue of the color of the LED lighting and something completely new to me. . . CRI (Color Rendering Index).  When you are working with photographs, CRI becomes a very important consideration as well as color temperature.

Most everyone is familiar with color temperature.  Measured in degrees Kelvin, light is either warm or cold in appearance.  The standard incandescent lamp has a color temperature of somewhere between 2700K to maybe 3000K for some halogen lamps.  We have always used standard reflector flood lamps which inherently have a color temperature of 2700K.  LED lighting now is available with color temperatures that range from 2700K to 5000K.  This was an easy choice for us. . . what I wanted was something that matches what I have always used, so 2700K is the logical choice.

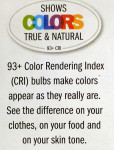
Seems that the newest specification for LED lighting is the appearance of CRI.  You will find very few lamp manufacturers that will specify the CRI.  CRI is a measure of how well a light source reveals colors.  The sun has a CRI of 100.  The very least you can expect anywhere near true color is a CRI of no less than 84 or so.  Most incandescent lamps have a CRI of about 93 to 94.  Many LED lamps have a CRI of about 80. . . not that great.

There is one more specification that is important and that is the lumens a lamp produces.  This is simply the amount of light created for the watts of electricity used.  The higher the number, the more light output.

That is a lot of information, but let it suffice to say that things have finally caught up with what I might call the Heat : Color : CRI : lumens : $$$ ratio, and it is finally time to seriously look into LED lighting.  We found a suitable replacement for the lighting in our workroom and proceeded to test the LEDs against the old incandescent lamps.  I first replaced random lamps among twelve 45W reflector lamps that light our work area.  Once on, I could not detect any difference in the light color, coverage or quality.  I looked at color under each light and saw no perceivable difference.  I had one more test. . . take a digital photo of the room and see if the camera could see any color difference.  We both looked at the photo and could not tell where the LED lamps were compared to the others.   The biggest difference we saw in the workroom was the blue of the light coming in the window from outside.  So far, so good!  Next we lived with the new light for a few days.  Did the color comparison several times.  Took more digital photos, both with the Panasonic digital cameras and with the iPhone camera.  Still, even the cameras were not showing any difference.  That was it!

Next. . . the darkroom.  We have had two fluorescent fixtures in the darkroom for as long as we have been here.  I hate those greenie-weenie light things know as fluorescent.  I have wanted to install track lighting above the sink for years, but did not want to put up with the heat.  We installed a track with four fixtures and 65W equivalent LED lamps. . . what a difference!  We also installed two, three-lamp fixtures for general room lighting.  We next repeated the tests with the cameras and there is not a detectable difference in the color of the light.  We did several visual color comparisons and there just wasn’t any discernible difference between the incandescent and the LED lamps.  That was pretty much all that I needed to see. . . fixed!

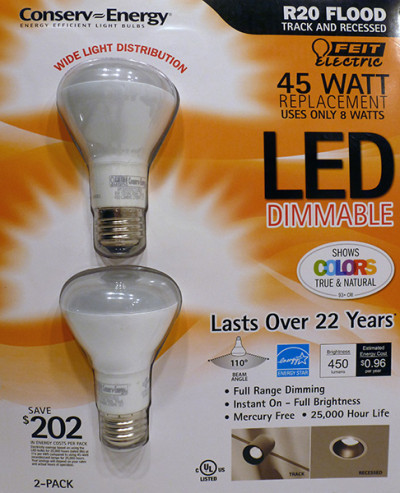
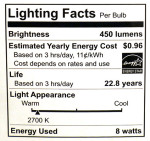
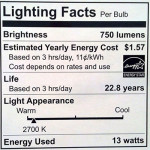
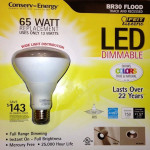
I know the question will come up as to what manufacturer and which lamps we selected.  We chose the Feit Electric R20, 45/8W, 450 lumen and BR30, 65/13W, 750 lumen LED lamps.  These are reflector lamps with a 110 degree beam angle and a CRI of 93+.

One of the most noticeable things about the LED lighting is the absence of searing heat.  The lamps themselves do get warm, but there is none of that burning IR heat that will even warm a black object on the table top.  I also need to add that these LED lamps are dimmable and do work with every dimmer we have tried them with here.

 
If you are looking to upgrade to LED lighting, these seem to be about the best at this time.  I am sure that as the technology matures, you will see even better performance and pricing.  It is like most all high-tech items today. . . you have to choose a point, then jump on the band wagon.  Tomorrow there will be a whole new ball game.  At least we have chosen to start now.  We have taken the leap into LED lighting.  We’ll see how well these hold up. . . the manufacturer claims their lamps have a 22 year life!

JB

Posted by JB Harlin in Darkroom, DIY, Photography

A DAY FOR CHOOSING

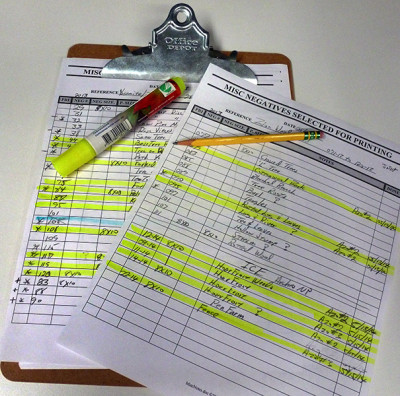
Negative Selector SheetsEvery time I head into the darkroom I learn something new. I learn another way of thinking, working, creating or just being a photographer. Everyone knows that the first thrill in photography is just being there. You are out in some visually exciting environment, suffering from optical overload. You know that the vast majority of the film you expose will never be printed, but still you shoot away. I cannot count the number of times that the one I really had hopes for really flops when printed, and the one that was just a wild guess is a keeper. That is why you shoot. . . even if you are not really confident the results will be worthy of the film. You just never know, but if you do not make the exposure, you are guaranteed to have nothing.

Once you have all of the film processed and proofed, then begins the arduous task of selecting what you want to print. This is always a tedious and mostly unforgiving chore. Making a finished print is time consuming. I would say that either of us will put in ten to twelve hours in a typical printing session.   And, generally we will produce, on a good day, four finished prints. Some days maybe less. That is why it is very important that the negative chosen needs to be well thought out, and you need to have some amount of confidence and a plan before you begin.

I don’t want to go into the darkroom and start haphazardly printing. I want to have some organization and a good idea of what I am going to be doing before I begin. Nothing is more frustrating than floundering around without a good starting point. It is bad for the head, it wastes time and materials. I would rather not print a day, spend that time getting prepared and then print the next day. I find that creativity is fleeting and if I am not in the mood, don’t even go there. Find something else to do till your mindset is correct. Negative Sheet

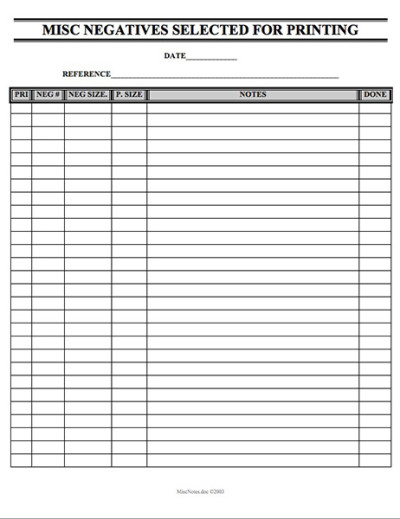
The process of negative selection begins by studying the proofs. We have worked up a sheet that we fill in with interesting photographs we would like to print. We call this sheet “MISC NEGATIVES SELECTED FOR PRINTING” and it is little more than a group of boxes to fill in with negative numbers, film size and notes. I ginned this up using a word processor years ago and we run off multiple copies and keep them on a clipboard in the darkroom.

As I said before, I keep refining my creative process. I have learned one thing that is even interesting to me. I have found that I print much better, have much greater success that is, if I concentrate on one particular type of photograph in a printing session.   For me, at least, if I am printing say wood and leaves and having a good day, it is not a good idea to switch to printing running water or snow. It just doesn’t work well for me.

So, I have begun grouping my selected negatives into those that are of like content. An example would be; on our last trip we were in Yosemite NP, Zion NP and Arches NP. I did a lot of wood details in both Yosemite and Zion, so I have grouped all of the similar subject negatives onto one sheet. This way, I will only print those negatives in one, or several consecutive printing sessions. I have quite a few snow and ice negatives from Yosemite and Arches. Those will be grouped and printed in another session.

This may sound strange, but for me at least, I find that I print better when I get into one sequence of thought and keep the subject matter similar. It just works better for me. . . maybe it would work for you also?

Finding something worth exposing a sheet of film to is one thing. . . the next step is selecting the very best of your film for the finished print. Anything you can do to help will be a great asset to your art.

JB

Posted by JB Harlin in Commentary, Darkroom, Photography

ARE YOU USING CLOTHESPINS?

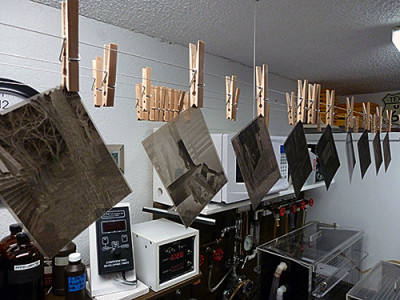
There are some things that seem to never change, or are never improved upon.  I have used the lowly, common wooden clothespin forever to hang sheet film to dry.  I have a bunch of them strung up on picture framing wire with springs at one end to keep the wire taut.  I had never given much thought to the fact that the common wooden clothespin sticks to the corner of the film and usually splinters a little wood onto the film when you remove it.  Just a fact of life and I have always lived with it.  I try to clip the very edge of the film and it has never been much of a problem. . . it is more of an annoyance.

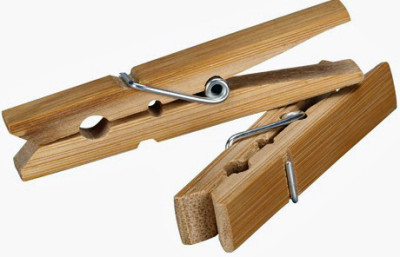
There are times that things just happen unexpectedly.  I was walking through a store several years ago and saw something I had not seen before. . . bamboo clothespins!  Didn’t think much of it, but I did examine them closely and noticed the bamboo looked like a good material for a clothespin since it was not as porous as the wood I was used to seeing.  I ended up purchasing a package and replaced one of my film lines with them.

I was amazed at how well they worked.  They held the wet film just like what I had been using. . . they did stick, but not as bad. . . and. . . they did not splinter.  I immediately replaced all of the clothespins on my drying line and have been well pleased with the result.

You never know what you will discover if you take the time to look around.  If you are one that uses the old wooden clothespin to hang your film, you might want to look into getting some bamboo.  They work great for me!

JB

Posted by JB Harlin in Darkroom, Film, How-To, Photography