28
Jul
2010

 Almost forgot about the other little project we undertook a few months back. Susan found a KB Canham 4×10 and it ended up in our possession. Because we strive to keep our equipment as homogeneous as possible, the new camera required a few modifications just like my 8×10.
Everything around here seems to end up in the shop before it hits the road. So, here is another little story about camera modification. Take a look at the article WHY MODIFY ANOTHER CAMERA? to see what happened this time.
The good news is we took the cameras on a little outing a few weeks ago and the negatives were just fine. No light leaks, nor any other strangeness. Guess this one is ready for the road. Time for fall, then winter, and much cooler weather to get out and haul some equipment around.
 Wax keeps moving parts moving smoothly and a well waxed surface is easier to keep clean. Dirt and contaminants do not stick to a waxed surface. A slick, waxed surface is easier to keep clean. Also moisture is not as much a problem. I can say that we wax most everything except the lenses.
So, what kind of wax should you use on your expensive equipment? We use only the highest quality Microcrystalline waxes on our gear. Microcrystalline waxes are far and away, the finest wax you can use.
They offer excellent resistance to moisture, food acids, alcohols, moderate temperatures and are pH neutral naturally. Another benefit is that they will not show fingerprints on treated surfaces. Microcrystalline waxes also dry crystal clear, never yellow, leave no chalky residue and resist dust as well!
What brand of Microcrystalline wax do we use? RENAISSANCE WAX-POLISH has been the #1 choice of museums, art galleries and institutions for the preservation of precious items for over forty years. Professional conservators, retailers, restorers and private individuals throughout the world depend on RENAISSANCE WAX to protect their collections and for in home use.
All I can say is, this stuff is great and highly recommended. It is SAFE to protect all of these Materials:
Wood; raw & finished. Leather, Parchment & Paper. Metal; Silver, Silver Plate, Gold, Copper & Copper Alloys (Bronze, Brass, Tin, Zinc, German Silver, Nickel), Lead & Pewter, Iron & Iron Alloys, Tin & Tin Alloys. Damascus; Stone, Marble, Onyx, Limestone, Granite, Brick, Tile, Terrazzo, Obsidian, Alabaster; Gems, Glass, Porcelain, Holloware, Bone, Ivory, Horn, Shell & Mother-of-Pearl, Gutta Percha. Dammars; Gilding & Gold Leaf, Patinas. Enamel, Lacquer, Japanning, Cloute, Pose d’Or, Pique Point, Varnish, Marbleizing, Stains & Artificial Graining. Plastics, Formicas, Paints, Polyvinyl Acetates, Esters of Polymethyacrylic, Polycyclohexanones, Fiberglas Epoxy Resins, and much more!
Guess you can say that we are sold on Microcrystalline RENAISSANCE WAX. You can find it at most woodworking supply stores and on line. A quick Google search will turn up a lot more information. Well worth the cost and time it takes to apply. A little “Wax On. . . Wax Off” and you are good to go most anywhere.
 Why on earth would someone take a new, perfectly good, working camera and make numerous modifications to the original design? Maybe more to the point, who would do such a thing? Well, I would! Especially if it makes the functionality of the device more easily fit my mode and way of working.
I have said this many times and I will repeat it here; I want the hardware involved in the process of making a photograph to be as transparent as possible. By transparent, I mean that the equipment should not be a distraction when out in the field making an image. I want the hardware to fit my way of working so well that I do not have to concentrate on working with it. I do not want to have to fumble with the camera and be distracted by some aspect of its operation that is not fluid in its use.
The way I make my cameras as transparent as possible is to modify them to whatever extent necessary to make them fit me. Yes, this requires I disassemble the camera and make modifications. I would rather do this now, in my shop, where I can work out these things so they do not hamper me later in the field.
What is all of this about? Well, I just acquired a new K.B. Canham 8×10 camera and in order to make it fit me better, I had to make a few modifications. If you are interested in seeing what I did, take a look at “NOTHING HERE REMAINS THE SAME; PERSONALIZING MY K.B. CANHAM 8X10” for a look at what I did.
Have fun reading this account, but remember kids. . . you may not want to try this at home!
JB Harlin
 I have had a lot of really positive feedback on my recent text titled Bellows Building. I would like to thank everyone for the kind comments. There have been several inquiries for more information regarding Railroad Board, exactly what it is and where to purchase.
Railroad Board is the best material for bellows ribs. It is a smooth, thin, Bristol-type board, colored on both sides, that is used for signs, posters, mailing cards, tickets, tags, and so forth. Thicknesses are 4 ply (about .017″ or .43 mm) and 6 ply (about .022″ or .56 mm) and is available in 22″ × 28″ sheets. I recommend 4 ply for small bellows smaller than 8×10 and 6 ply for larger bellows.
You can purchase Railroad Board by the sheet or in bulk packages from Dick Blick. I would recommend black material and here are the stock numbers and the direct link to their on line CATALOG ;
 If you own a wooden camera, be it a modern model or an old one, you will eventually need a lens board. The first thing most people do is try to find a suitable lens board from a dealer, off the internet or have one custom manufactured. But, did you know it is not that difficult to make your own. And, if you make it yourself you know it will fit!
Most modern wooden lens boards are made of solid hardwood and require three to four pieces of material to construct. Believe me nothing is more frustrating than to go through the process of fitting machining hardwood pieces to have them warp or crack. Also, nothing looks worse than a piece of birch plywood painted black.
So, what to do? I say make your own using plywood. Correct. . . Plywood. It will not warp or crack and is easily obtainable. All you have to do to make it look decent is to veneer the outside with the same wood as your camera and finish it. You will not be able to tell the difference from the  solid wood boards.
Take a trip to your local woodworking store, or search on line, for some high-laminate birch plywood in the nearest thickness to the lens board that your camera uses. Hobby shops also sell suitable high-grade plywood. You will also need a few pieces of veneer of the correct type. I cross laminate the veneer and it looks just like the multi-piece hardwood boards. Look on the Internet for tips on wood laminating, it is not that hard to do. Carefully measure an original lens board and using a saw and router duplicate the profile and sand to fit your camera.
The hardest part is drilling the hole for the shutter. Here you will need a Forstner bit that is the closest to the size of the shutter you intend to mount. Remember that most shutters are metric, so choose a drill that is just under the desired size. You can then us a round file and sand paper to adjust the fit.
Once you are satisfied that everything fits, it is time to finish the board. I black the back of my boards along with the light trap offset and edges. I use black India ink which penetrates the wood and dries to a flat, non-reflective finish. Only the veneer front requires a fine finish. I use varnish, you can use spray acrylic if you like. You may have to apply stain to match your camera, experiment on a scrap of veneer first.
It is really easy to make your own high-quality lens boards. The last time I did this I made about six blanks and I still have extra undrilled boards on hand.

To dry mount or not. . . that is a question? This debate seems to roll on forever. Sort of like Ford or Chevy? Is there really a correct answer? I have made my choice.
For me there is nothing that comes close to a properly dry mounted photograph. Once I made my choice, all I had to do was learn the process. I worked out a method that gives me what I like, and if you are interested in dry mounting your photos and have never learned the process, I have a little booklet that details my procedure.
This is not the only way, it is just my way. . . and. . . if you are interested, it is FREE!!! Take a look HERE for “DRY MOUNTING PHOTOGRAPHS” pdf download.
 Once you become a serious darkroom worker you will eventually want a real darkroom sink with running water. The question is, to buy, or to build? Certainly, if you have deep pockets, you can buy a commercial stainless steel sink. You can even have a stainless sink custom fabricated. Just be forewarned, you are looking at a serious amount of money.
What most do is build their own sink, typically from wood. This is my favorite construction technique and allows me to build a very functional sink to any size required. In the previous post titled “NOT THE KITCHEN SINK” we showed what it took to build a large darkroom sink from wood. Robust construction is essential to make sure the sink does not flex. Flexing can cause the finish to crack and begin to leak.
My philosophy of sink building is to build the thing like a boat. Using construction robust enough to sail the ocean. That way it is strong enough to stand up to most anything. Once complete, I like to climb into the sink and jump up and down. If nothing moves, creaks, or breaks, I am satisfied that I have a good strong sink.
After much research I found a suitable coating for my darkroom sink. Tile-Clad® HS Epoxy is a two-part, commercial-grade, epoxy-polyamide coating from Sherwin-Williams. This epoxy paint is used in power plants, offshore structures, schools, storage tanks, laboratories, hospitals and marine applications. This stuff dries rock hard and is near impervious to most chemicals.
I have found that two generous coats of Tile-Clad® makes a great smooth waterproof finish for a darkroom sink. You can also have the paint tinted to most any color you desire. Most any Sherwin-Williams store should have Tile-Clad® and be able to tint it for you. Be prepared, this material is not cheap. Seven years ago when we built our last sink it was about $110.00 for a gallon of part ‘A’ and part ‘B’ which, when mixed, makes two gallons of paint.

In the fall of 2002 we made the reluctant decision that we needed a larger darkroom sink. This sparked a month long project of designing a new 3 1/2×10 1/2 foot sink. The new, larger, sink was to be modeled after the current, smaller, sink. The same basic idea was to be employed. The sink height would be the same. The depth would be greater and it would be as long as the room would allow, about 10.5 feet.
Cabinets for storage would be constructed at each end of the sink with slots for trays in between. There would be space in the right hand end for the water chiller and racks for chemical storage at each end. The backsplash would be a copy of the old one, only larger, and would contain the same plumbing, including filters, two mixing faucets and temperature control unit.
Having determined the necessary measurements it was just a matter of gathering the materials and getting to work. It took about three weeks to complete and install the new sink. Construction was my usual battle ship, massive over kill, design, using plenty of nails, screws, lag bolts, caulk and paint.
For those that are interested in seeing what is involved in building a wooden sink, click HERE to visit our snapshot album chronicling that little undertaking. This is not your typical kitchen sink!
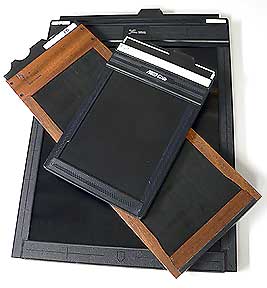 How do you identify sheet film? You put unique numbers on the film holder, but how can you identify which sheet of film came from any particular holder? You may be able to identify the film by taking notes and knowing the subject. But, what if you make several exposures of the same scene, say using different filters? How do you know which filter was used on each sheet?
We hit this impasse many years ago and I came up with a simple solution that has worked for us for years. All you have to do is file a notch code into the film loading flap. We have used this system to number over one hundred 4×5 holders. Want to learn how to modify your film holders? Take a look at “A QUICK & EASY SHEET FILM NUMBERING SYSTEM” for the details.
Hope you find this helpful. . .