 Seems everyone has their favorite method for exposing and developing film. You do shoot film, don’t you? If not, you should! But I digress for sure. . . There are as many ways of working with film as there are opinions. . . maybe more. None are better or worse than any other, if they work; if they give you the results you insist on within your own vision, then you are already there. But, in this day and age there are a lot of people coming into photography and just now discovering film and the traditional darkroom. In the beginning film is a mystery and requires some time to begin to master. Of course, the most important thing is that you shoot film and make finished photographs. How you get there is a very personal thing and you need to choose what works best for you. But, you have to start somewhere.
For me, I prefer simplicity when I am out making photographs. I do not want to get bogged down with a lot of complexity. I struggled with film exposure and development, like I would speculate that most everyone has when they first start out trying to understand film photography. It was way back in the mid 1970’s when I realized I could process and print my own photographs. This was a big deal for me. It started a lifetime involvement with photography and the wet darkroom.
I stumbled around, trying this and that looking for that magic technique that would give me a negative that would print what I saw in my mind’s eye in the finished print. I read everything I could find on the subject. I even toyed with the idea of becoming a strict Zone System practitioner. Thing was, everything I looked into was just way too complicated. There had to be a simpler way. . . at least, that is what I thought.
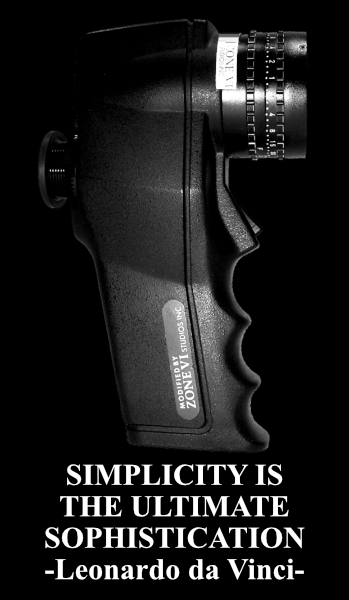
Somewhere in the 1980’s I discovered Fred Picker and his “Zone VI Workshop” book. This was exactly what I was looking for. It made sense and contained a simple approach that I found worked! Having found someone that was also into simplicity, I subscribed to the Zone VI Newsletter. I remember really getting excited when I discovered the latest issue in the mailbox. Plenty of opinion and advice that really made sense. To this day I still have my complete set of these newsletters. About 25 years ago when I seriously decided to start working with large format photography, I read the entire set again. . . three times. . . every issue, #1 through #83.
I had experimented previously with what Fred called MPD (Maximum Printable Density) back in my early days in photography. I had very good results, but I drifted away from the darkroom for a while to concentrate on a career. When I moved back into photography after a brief hiatus, I dove right into large format. I needed to relearn my darkroom skills, at least to the point where I had left off and establish a sound working technique.
MPD is such a simple approach to exposing film that most think it will not work. It is deceptively simple for sure! I did some experimenting to get back into the groove and continue my experiments with simplicity. I found that MPD was just what it claims to be. . . SIMPLE. . . and well-suited for any film format! I am a big fan of ‘simple’ for sure. As with anything, it is ludicrous to use something that does not work. Why make it worse on yourself. I approached MPD with the idea, that as long as it works, I will use it.
It is funny how there are things that just seem to fit you and continue to do so. It has been over 25 years now and I still use MPD. Why? Because it works! My wife uses it and she is sold on the idea of simplicity also. If you have seen any of our original prints from LF negatives, you have seen film exposed using MPD.
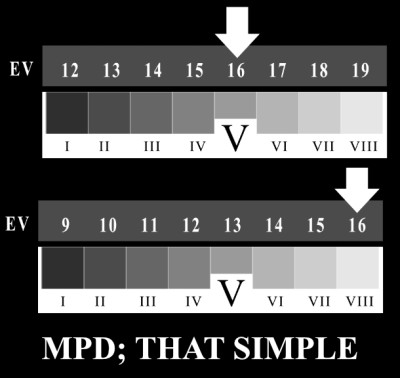
Oh, guess I forgot to mention exactly how simple MPD is in practical use. Here goes, don’t blink; 1. Find your subject, compose as you wish. Not much new there. But, here it comes. 2. Meter the area you wish to render as a Zone VIII. White painted wall, snow, sand. . . whatever you wish to print as finely textured white (Zone VIII). Meter that area. 3. Open up three stops, or place the reading on Zone VIII if your meter has a Zone Dial. 4. Set your exposure and expose the film.
It is actually even easier than that;
1. Meter
2. Place VIII
3. Expose. . . DONE!
Now, don’t believe this is a haphazard way of working. First, you must do your film testing. You need to establish your working EI (Exposure Index) and your normal (N) developing time. You need to establish a proper proofing regiment. Your proper proofs are your control. They tell you just how you are doing with film exposure and developing. Study your proper proofs and make fine adjustments on the fly. Thing is, once you find a starting point, things get much easier. You do not have to engage in never-ending testing. Test once. . . find that starting point. As Fred Picker said, “Get one foot on a rock.” Then you use your proper proofs for fine tuning and a constant check on how you are doing. Simple!
Are you interested in making really good negatives? Want to understand proper proofing, personal film speed and developing times? How about getting started using MPD? Interested in getting the technical stuff behind you?
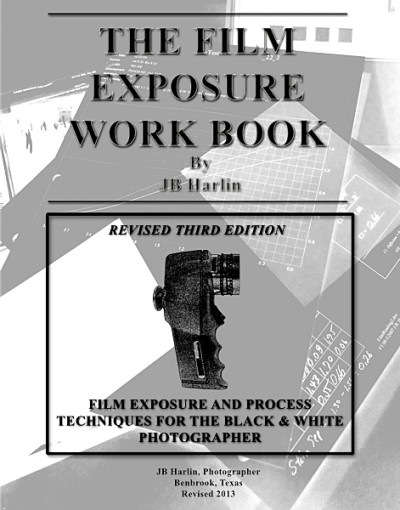
I was asked how to use MPD and what testing was necessary years ago. I wrote “THE FILM EXPOSURE WORK BOOK” specifically for those interested in learning where to start. This 44 page book is now available for download in e-book format from our online store. You will learn how to establish your working EI. Determine your N and N+1 1/2 developing times. Proper Proofing is covered and much more. You will also get a printable 12 page Work Sheet to record your testing results.
Is MPD right for you? If you are just starting out with film, it just might be if you are interested in a simple, reliable method for making the best possible negatives. Fred Picker had a large rubber stamp that said TRY IT. He used it to answer letters people wrote to him asking questions. You will only know if you TRY IT. It has worked well here for over 25 years!
JB


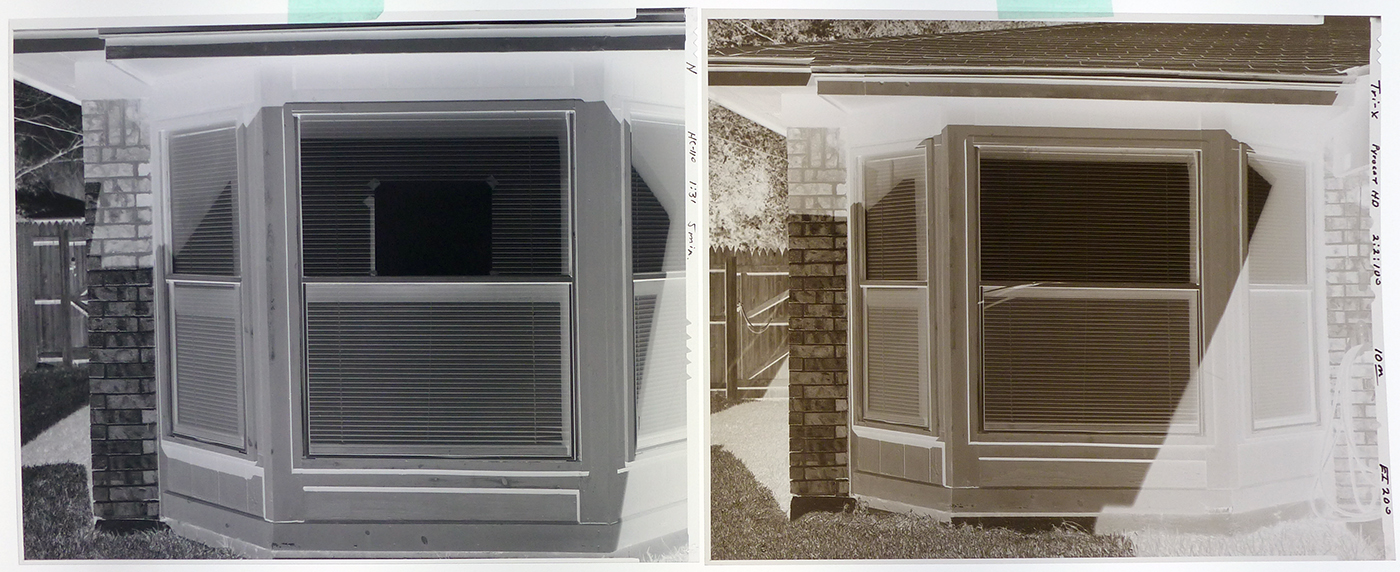 When we first started working with Pyro developers it took some time to realize exactly how the different look and feel of the film would translate into the finished print. There are those that say there is no difference between different film developers. They may also say there is no difference in the film you choose. That is like saying there is no difference between Ford and Chevy; no difference between red or white wine. Maybe for some this may be the case. But for those that take the time to really look and absorb the image, there is always a difference. Fred Picker said, “different is not the same!”
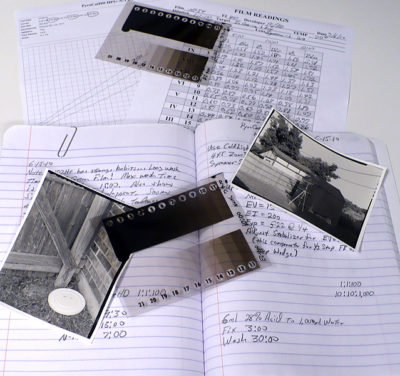 Over the past 20 or so years Pyro film developers have again become popular, with modern reformulations for modern film. John Wimberley, Gordon Hutchings, Sandy King, Jay DeFehr, among others, have done a lot of research and have formulated numerous reincarnations of Pyro film developers, specifically designed for use with modern film. Steve Sherman, Bob Herbst, Michael A. Smith and Steve Simmons have written extensively about Pyro developers and their unique qualities. Susan and I have made our choice based on our own real world experiences. We join with the many others that are also Pyro developer users.