26
Aug
2012

 They say the more things change, the more they stay the same. Whatever that means. It seems like only yesterday I standardized my chemicals for printing and started using Zone VI Fixer. That was over twenty years ago. But you know, things do change, and they are not the same. We are down to our last box of the old standard Fred Picker Fixer and it is time to start rolling our own from bulk chemicals.
Actually, I started researching this over a year ago and we have obtained several hundred pounds of Sodium Thiosulfate in anticipation of this day. This is the principle chemical used in fixer and though not difficult to acquire, it is expensive to ship. Sodium Thiosulfate Pentahydrate is used in water treatment to remove chlorine. It is available from many pool supply sources. Also, check the Internet and eBay, there are sellers there that will ship to your door. You will need about two pounds per gallon of fixer. We go through anywhere from half a gallon to a gallon of fixer during a typical printing session, so we need a lot of the raw material. But, this is the price you pay when you work in the wet darkroom and we believe it is more than worth the effort.
The next question is what formula should I use. Since we are only talking about paper fixer, then there is no reason to even consider a formula suitable for film. We just need a good, dependable fixer for processing fiber base papers. Now we get into the discussion about acid vs. alkaline fixer. Boy, does that ever stir the pot. Almost like asking film or digital.
Well, I want to change as little as possible and using a running water stop bath instead of acetic acid is just not what I want to mess with. I did not want to change anything, or at least, I wanted to change as little as possible. So, it was immediately determined that an acid fixer was best for us. There are many formulas out there, and everyone has their favorite. I have tested several and settled on what we intend to use.
Also, we needed a formula for plain hypo for second fixing bath and pre-selenium toning. I found what I needed there also, thanks Ansel.
So, if you are interested in what we use, I have added our fixer choice to the Formulas Area of this BLOG. Drop by and take a look. The formulas we have chosen work fine, are simple, easy to mix, and does the job as needed. Obviously, I am not a chemist, and I am not into discussing chemical formulas. For me, working in the darkroom and mixing chemicals is only a matter of finding a recipe that reliably works, sticking with it, and getting on with making photographs. I don’t care much about the innards of chemistry. . . I’ll leave that to the chemists.
Things do change, and they are not the same, but who cares, as long as the results are the same. Fred Picker said, “different is not the same.” I miss ol’ Fred!
 Seems the last couple of times I have tested the darkroom safelight I have had to cut down the illumination. That should be a clue that the filters are fading and it is time to replace them. We use a Thomas Duplex Super Safelight that I rebuilt many years ago. Since we have a small darkroom I knew I needed to attenuate the light. My original safelight was modified when I rebuilt it and the 35 watt lamp was replaced with a 18 watt lamp. Note: You have to replace the ballast and start capacitor if you change the lamp wattage. Wasn’t that big a problem seeing how the original ballast was no good. I purchase the safelight many years ago not working for little to nothing.
So, now I needed to replace the filters. Since I am only interested in B&W, work that simplifies things for sure. All I need to find is the correct filter and then I can assemble my own replacement. I have plenty of scrap glass, and tape.
With a little research on the Internet I discovered that the hard part had already been done. Seems a Rosco #19 “Fire” filter has the necessary bandwidth to filter out the annoying green and blue spikes in the low pressure sodium lamp spectrum. And, seems that others had proven this the best way possible. . . they tested it in their own darkroom.
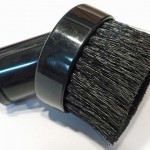
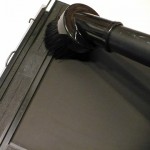
We have a lot of scrap glass around. I cut new glass to fit the body and vanes using TruVue Conservation Grade UV glass. Thought it wouldn’t hurt to add even more filtration. I also found out why the factory uses tissue paper. Without it, the filter material does not look that great against the glass and I could see that if any moisture were to condense in there, it could be bad for the filter. I really didn’t want to use tissue paper and I had a roll of Gila frosted window film from another project. This stuff is a self-adhesive plastic material used to frost windows. It was exactly what I needed to put a smooth textured surface on the inside of the glass to keep the filter from sticking. It also works well to diffuse the light.
One of my favorite tapes is the aluminum HVAC ducting tape. It is lightproof, sticks and stays in place. Slit a few pieces of tape, peel the backing and it will hold the filter sandwich in place with ease.
 I have to admit that I am a contact printer. Susan and I both contact print. There seems to be some confusion about contact printing and all I can say is, it is the easiest way you can make a print. Contact printing is nothing more than laying the negative directly on a sheet of printing paper, covering it with a piece of glass, and adding some light for the exposure. Nothing could be more simple. You do not need any special equipment to print on graded paper. A negative, some graded paper, a sheet of glass, and a lamp.
As a side note at this point, note I use the term LAMP. I have been corrected for years by an old friend that worked in the lighting industry at one time. In the industry, there is no such thing as a Light Bulb. . . it is a LAMP. So when I say LAMP, you can be assured that to the laymen I am talking about a Light Bulb. Now back to contact printing.
You can contact print on any paper, but one of the more interesting papers that is highly sought after is the old Kodak Azo. Azo is a silver chloride printing paper that was manufactured primarily for making proofs. It is extremely slow and requires such a large amount of light to yield an image it is mostly used as a contact printing paper. There seems to be some confusion about printing on Azo, and believe me, it is not that complicated. You just have to use a light source that is bright enough to yield reasonable printing times. This is where the lamp comes in.
All you need for printing on Azo is a simple, frosted lamp. For small negatives, 4×5 or smaller you can use a sheet of thick glass for printing. Larger negatives require a printing frame that holds the paper and negative under pressure. Edward Weston printed most of his most famous work using an 8×10 negative in a simple spring back printing frame, exposed under a lamp hanging by its cord from the ceiling. He adjusted the lamp intensity by changing the lamp size, or moving the lamp up and down by coiling the cord and using a clothespin.
So, now we get down to designing a printing rig for Azo. This can be as simple or complicated as you wish. I am going to describe how we print Azo and other papers. This is the setup we use, and how it is designed. I will say this again, you can use this same setup for contact printing regular enlarging paper also.

Jobo Announces first Film and Print Processor in over 20 years!
Posted on April 3, 2012 by Firstcall Photographic
Jobo stopped production of its rotary processors in 2010. In doing so it became the last manufacturer to market a range of film processing machines to photographers.
With the resurgence in demand for film usage, reduced mini-lab sites and film processing in multiple retailers, they have decided to re-tool to make a new film processor that will be available in the last quarter of 2012.
Based on the original design for the Jobo CPP2, the new model has the initial product code of CPP3 and will have the capability to process all types of film and paper. It will have accurate temperature control, timer and take all Jobo tanks up to the 3000 Expert (sheet film tank system). The original CPP2 concept will also be maintained in that it will have both cog and magnet lid connection for use with a lift and normal rotary agitation.
To get a technical Specification and a free £290 lift with purchase of the processor send your name and contact info to info@firstcall-photographic.co.uk
 Even way back then I kept a notebook with all of my darkroom procedures laid out in a step-by-step fashion. This way I knew I would always do things exactly the same. I used the same graduates, arranged in the same order every time. Developing film is a one shot deal. Make a mistake and that is all she wrote. At this point in my progression with film and darkroom, I had become confident in my ability to develop film. The process had become the first step on the way to making prints.
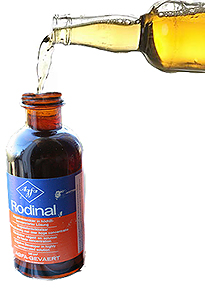
My procedure for film was simple. I would line up my chemical containers in the correct order. Fill them with the proper liquids and adjust the temperature. Then I would head to my closet darkroom to load the film into the developing tank. I used a 16oz tank that held two reels and I usually did two rolls at a time. I loved the Rodinol because it came in a stock syrup and was mixed something like 1:200, if memory serves me correctly. I would measure the stock using two small syringes since it only took a few milliliters to make up the developer. I would lay the syringes, once loaded, next to the container marked developer which contained distilled water. I always have used presoak, so once the film was in the presoak, I would empty the syringes into the developer container and stir up the developer. Not much to it, simple and easy. Usually took me about forty five minutes from start to hanging up film to dry.
Now this one particular Saturday myself and a few friends went out and I shot two rolls of film that day. Later that evening we returned to my place for a few beers and by about 8:00 everyone headed home. I had this bright idea that if I processed the film from the day it would be dry and I could print it Sunday. Nothing to it, just get out the notebook, measure and slosh. . . processed film!
There was nothing very special about this film run, except the slight fog in my head from the beers and maybe a little to much sun. Everything went as usual. Once the film was washed I unrolled the first strip to find it completely clear end to end. The second roll was the same. What the @#$%^*? My first thought was the camera quit working. As I sat there perplexed I looked at my processing line and what do you think I saw? There next to the empty container for the developer lay my two syringes with the stock Rodinol still in them. I had failed to mix the developer. I learned right there that plain distilled water will not develop film. I also immediately enacted a strict rule in the darkroom; NEVER MIX RODINOL AND BEER!
JB
 I have always been an advocate of vertical integration. The more you can do yourself, the better control you have of the outcome. For many years I used prepackaged photo chemicals and have never had a problem. But, as the traditional darkroom and the materials used become more and more an alternative process, commercially available photo chemicals are getting harder to find. Some favorite chemicals have vanished. An old favorite, the Zone VI line of print developer, fixer and hypo are now gone from Calumet. I recently witnessed 8 bags of print developer and 2 bags of print and film fixer selling for $127.50 on eBay. That is well over double the original cost from Calumet.
The bottom line is, you can mix your own photo chemicals. Sometimes, if you purchase bulk raw chemicals, you can even save a few dollars. Another plus to mixing your own is the fact that you have 100% control. If something goes wrong, you know who to blame. You can also modify the formula and experiment. Mixing your own photo solutions is not hard. It is not rocket science and you do not have to be a chemist. If you can follow a recipe and bake a cake, you can mix your own chemistry for the B&W darkroom.
The first thing you need to understand is that in order to mix your own photo chemistry you will be handling CHEMICALS. If you are not comfortable with this thought, do not even go there. But, remember that you are surrounded with chemicals. . . the entire planet is made of them. If you take proper precautions and are careful, there is nothing to fear. I am not a chemist, so I have little understanding of deep details and I have even less inclination to study chemistry. Do as I do, assume that everything you handle in the way of raw chemicals are toxic. Do all mixing in a well-ventilated area. Clean up spills immediately. Avoid breathing airborne powders. Always wear gloves and purchase a respirator with proper filter. A little common sense goes a long way.
 As I said before, for me, mixing photo chemicals is nothing less than following a recipe.

For liquids, I use an appropriate size graduate, and for small quantities, a pipette is the easiest way to make accurate measurements. You can use a pipette pump to make loading and measuring easier, or just dip the pipette into the container and hold your thumb over the end. Remember to always thoroughly wash the pipette after use and always use a clean pipette when going from one chemical container to the next. If the pipette is not properly cleaned, you will cross contaminate your chemicals.
Always follow the chemical formula. Most all formulas are mixed in water and there should be a temperature specified to insure the chemicals dissolve. Always mix in the exact order as called for in the formula. Add each ingredient slowly and continually stir until each is completely dissolved before adding the next. This is where a magnetic stirrer comes in handy. Take your time. Do not rush the process. Some chemicals take some time to completely dissolve.
 I use distilled water for all stock solutions. I always use distilled water for stock solutions and processing film. Unless your tap water has known problems, it should be fine for mixing printing chemicals.
Once properly mixed, store each formula in a clean bottle with a plastic cap. Never use metal caps, some chemicals will cause them to rust and contaminate the solution. Brown glass is best for developers and plastic should be fine for most others. Be sure to label each container as to its contents and also include the date mixed. Most all stock chemicals are good for three months, some much longer.
There are many published formulas. Some popular commercial formulas are proprietary, but in many cases there are alternative, similar formulas that are published. By applying a little experimentation, you can tailor your photo mixtures to suit you. Search the Internet for formulas and pick up a copy of “The Darkroom Cookbook” Third Edition by Steve Anchell.

 As most know by now, we use staining film developers. To be specific, we use the classic PyroCat HD formula from Sandy King. This developer gives us the type of negative we like. Keep in mind that creating art, no matter what may be your chosen medium, is a very personal thing. What works for me may very well not be at all acceptable to you. My father used to say, “that is why they paint cars different colors.” Personally I do not care for red cars.
All of that said, I have experimented with numerous staining developers and have chosen the one that works best for us. Along my journey of research I have found many opinions and myths that I have found to just not be true. Everyone seems to have an idea of what they believe to be true, but few have actually gone to the trouble to, as Fred Picker would say, TRY IT.
One area of great debate when it comes to staining developers is what stop and fix is appropriate. I find that this is not that great an issue and even John Wimberley agrees. Just in case you have not heard of John Wimberley, he is the father of modern Pyro developers. Even Gordon Hutchings the father of PMK, and author of “The Book of Pyro” was preceded by Wimberley and his first modern formula, WD2H. From an article titled “PyroTechnics Plus: Formulating a New Developer” in Photo Techniques magazine, March/April 2003, Wimberley has the following to say about Stop Bath and Fixer:
“Myths abound concerning the correct stop bath and fix to use with pyro, but it is not a critical issue. Either an acid or plain-water stop bath may be used, and any standard or rapid fixer is acceptable. . . However, avoid hardening fixers. I recommend the manufacturer’s minimum recommended time to avoid the possibility that sodium sulfite in the fixer might weaken the dye mask.”
 So, here is the predicament; you are getting ready to do your film testing; you have decided to use the simple visual film testing technique. Visual film testing is a really simple way to determine your correct film EI and developing time. All you need to do is perform these tests on a grade #2 paper and you will know you are making the best possible negatives.
>But, there is one nagging little problem. If you are using VC paper, how do you know what filter, or light source setting, that will produce a grade #2 contrast? Even if you are using filters, each filter set has different filters that will give different paper grades on different papers. Even the developer you choose can affect paper contrast. You really need to KNOW how to achieve a true grade #2, using your equipment and darkroom, in order to do a valid film test.
What if I could show you an easy, inexpensive, and quick method that will get you plenty close enough? Well, here you go. . . “FINDING VC PAPER GRADE #2; EYEBALL CALIBRATION.” This method should get you well within range to get you started on the right track.
 Begin by cutting off a strip of the paper to be tested in very subdued safelight to total darkness. Since the paper I was testing was 16×20, I cut off a strip across the short side about two inches wide. I then cut the strip in half. This gave me two pieces of paper 2×8 inches. On the back of the paper I mark one with the letter ‘F’ and the other with the letter ‘D’ and place the latter into a light-tight box.
The strip marked ‘F’ is placed into a tray of fresh fixer and agitated for five minutes. Then it is placed in a tray of running water. Next the strip marked ‘D’ is placed into a tray of developer, agitated for two minutes. . . stop for thirty seconds. . . and fixed for five minutes. I use my standard print developing chemicals and the normal times. If you use different materials, use your normal times. Once both strips are in the wash tray, turn on the lights and wash for thirty minutes. Remove the test strips and dry as usual.
What has happened here is I have cleared the test strip marked with the ‘F’ which stands for fixed only and I have developed the strip marked ‘D’ for developer as usual. All that is needed now is to measure the reflected difference. I used an X-Rite 810 densitometer to measure the difference and found it to only be about 0.003, which is nothing to worry about. Keep in mind that all light sensitive materials, film or paper, will have some amount of base fog when developed.
Fortunately I was able to report to my friend that his paper was in excellent condition and he was happy to be able to sell it to another photographer. Hopefully this batch of paper will live on to produce some beautiful prints.