24
Jul
2014

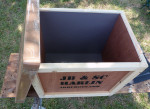
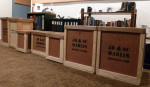
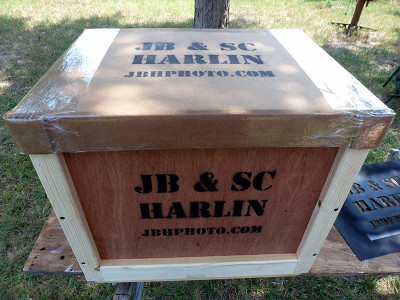 We seem to be doing more exhibitions and it is always a challenge to deliver framed prints. For years we used heavy cardboard boxes, but they are not that durable. It was always nerve racking to handle a box of framed prints on a two wheel dolly when transporting a lot of framed prints. There comes a time when you just have to build what you need. Wood crates are by far the best and safest way to transport multiple framed prints. This is not a difficult project and when you build your own, you can design custom-size transport crates that suit your specific needs.
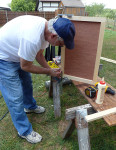
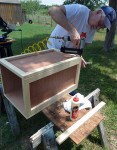
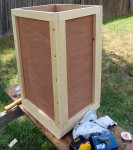
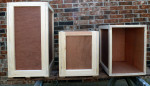
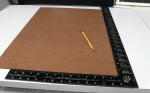
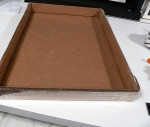
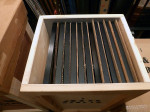
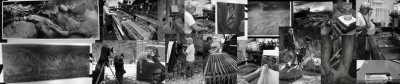
Building a custom transport box is nothing more than designing a simple wooden crate. We also make a cover that slips over the top from regular corrugated board. Gather a few pine boards and a sheet or two of 1/4″ plywood, some hardware and you are ready to start building. I like to use an air brad nailer and a cutoff saw, but you can get by with a few hand tools. I rip 1″x10″ lumber into 2″ runners and this requires a table saw. You could buy pine in 1″x2″ and skip this step if you don’t have a table saw. The side panels are made by cutting 1/4″ plywood to the desired size and then edging it by nailing and glueing 2″ runners on all four sides. These panels are then assembled into the box using more glue, brads and deck screws. The bottom of each crate is reinforced with wooden cleats and also have wooden skids with tapered ends. Take a look at the photos to get an idea of how our crates are built.
Once the box is assembled, I will go over the outside with a belt sander to smooth things out. Next I like to use a router with a 1/4″ round-over bit to round all edges. A little hand sanding and any chance of splinters is pretty much eliminated.

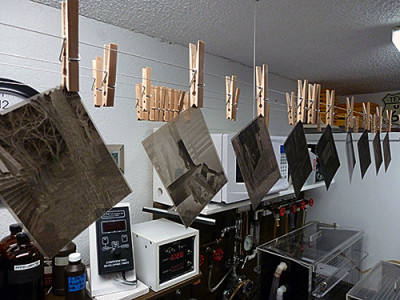 There are some things that seem to never change, or are never improved upon. I have used the lowly, common wooden clothespin forever to hang sheet film to dry. I have a bunch of them strung up on picture framing wire with springs at one end to keep the wire taut. I had never given much thought to the fact that the common wooden clothespin sticks to the corner of the film and usually splinters a little wood onto the film when you remove it. Just a fact of life and I have always lived with it. I try to clip the very edge of the film and it has never been much of a problem. . . it is more of an annoyance.
There are times that things just happen unexpectedly. I was walking through a store several years ago and saw something I had not seen before. . . bamboo clothespins! Didn’t think much of it, but I did examine them closely and noticed the bamboo looked like a good material for a clothespin since it was not as porous as the wood I was used to seeing. I ended up purchasing a package and replaced one of my film lines with them. 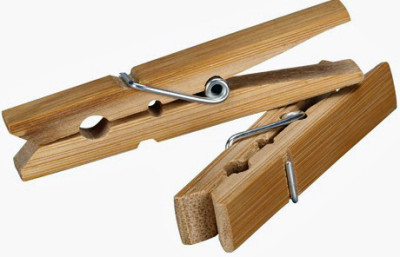
I was amazed at how well they worked. They held the wet film just like what I had been using. . . they did stick, but not as bad. . . and. . . they did not splinter. I immediately replaced all of the clothespins on my drying line and have been well pleased with the result.
You never know what you will discover if you take the time to look around. If you are one that uses the old wooden clothespin to hang your film, you might want to look into getting some bamboo. They work great for me!
JB
 Seems that a large view camera always attracts curiosity. Everyone either gives you a long wondering look or asks questions about that big box on a tripod. Mostly they want to know how old the camera is and if you can still buy film. Is that a Hasselblad is a question that comes up from time to time?
For those that are truly interested, a peek under the dark cloth is always a good way to confuse them even more. The first thing they do is stick their nose right up against the ground glass. With that point blank view you see nothing. I have to explain that they need to back up. That it is like looking at a TV screen. After getting a good look they suddenly realize everything is upside down. I have to explain that it is also reversed left to right. Comments range from silence to questions about how can you do anything when the world is upside down and reversed? I usual just say that you get used to it and it becomes part of how you and the camera work.
The truth is, nothing will improve your overall composition more than looking at it upside down. It is a way to trick your left brain into shutting up and allowing your right brain to take over. The left brain is your engineering side. . . it deals with facts and figures. Your right brain is the creative side. . . it deals with form and shape. We are taught from an early age to be left brain dominant, so we get used to ignoring our creative side. The quickest way to shut your left brain up is to show it something it cannot readily identify. With the composition upside down, the right brain is in its natural environment and unimpeded by the chatter from the left side.
>With the inverted view on the ground glass it seems that the subconscious sees things that the conscious mind does not pick up on. I see things on the ground glass that are interesting, they have absolutely no meaning, yet there is something inside that says this is something of interest. There are abstract images that I have made that did not register until I looked at the proofs. There are times that something just calls out to be framed and photographed. It may have no rhyme or reason at the time of exposure, but later becomes something of great interest, even something totally different than originally envisioned.
Do not be afraid of the inverted image. It is one of the most powerful assets you have when making photographs. You will quickly get used to seeing things this way. It rapidly becomes part of your connection to the camera and your subject. Do I recommend you get one of those reflex viewing hoods that turn things back around? Absolutely NOT!
JB

 Film testing is one of those things that is just a fact of life if you, like me, choose to continue to pursue that art form. I am no fan of any testing, that is for sure. But, there are times you have to test in order to better understand how things will work.
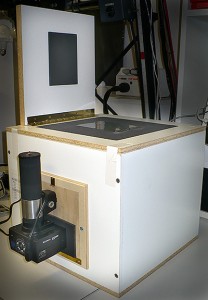
I never thought I would ever need a sensitometer, but never say never. To compare different film developer formulas, I found that I needed to run some tests. In order to make the test I needed to expose numerous sheets of film and expose them all identically. What I needed was a film sensitometer. What I did was build one. This project was not as difficult as I first expected and most everything I needed was laying around, either in the closet, or the junk box.
I wrote abut my experience designing and building a DIY Sensitometer back in 2009, then shelved the article where is has remained dormant since. Well finally, I drug the thing out and put it up on our web site. Interested in learning more about building a film sensitometer? Head over to the ARTICLES & HOW-TO area of our web site, scroll down the page to the link titled, “BUILDING A FILM SENSITOMETER.” You will see how I did it, and you may just want to try it yourself. . . if this is something you have a need for.
JB
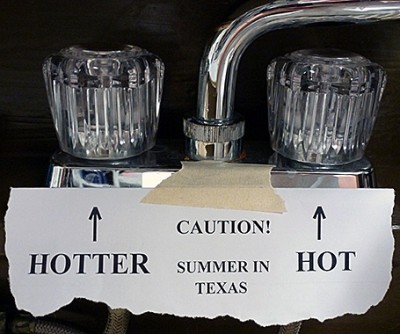 Yes, hot water is nice, but not when it comes out of the cold tap in the darkroom. Guess since the beginning of photography all wet processes are assumed to be run at 68F. Personally I have nearly always ran everything at 70F. This seems to be a good compromise since we live in Texas, where in a 12 month year, summer is 18 months long. Personally, I don’t care for temperatures to be much above 70F outside, but what can you do?
The cold tap here runs up near 88F by August, and for many years I dealt with that by freezing plastic bottles filled with water. Works well enough, but is still a hassle. Finally about 18 years ago I decided to look into a water chiller for the darkroom. I have to admit that I did try the coil of copper tubing in a washtub of ice water. Works to some degree, but is a mess to deal with. What I wanted was a no-muss, no-fuss way to chill the water to a manageable temperature.
So, you say you want a water chiller? That really is not a problem. There are commercial units that will provide very high volumes of chilled water. Problem is, they are large and expensive. So, like most things I had to find a balance between useable and practical. Everything is a tradeoff of some sort. I did a lot of research and eventually decided, based upon the limiting factors I had to face, that a small ElKay remote water chiller would be satisfactory. The unit I settled on was their Model ER101Y, which is rated as a 9.6 GPH (Gallon Per Hour) remote chiller. The unit was small enough to fit under the darkroom sink and ran off a 115 volt circuit. 
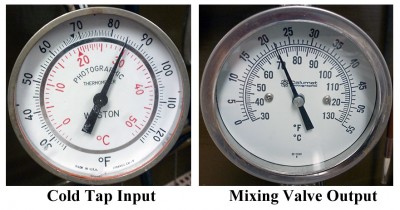
Now, the bottom line is, how well does this work? I have to admit it is not perfect, but it is certainly better than nothing and much better than anything else I had tried. The setup is very simple. I have a Calumet/Lawler mixing valve that in winter, when the cold tap is in the 50-60F range works very well. By adding the chiller in the summer I can keep a steady 70-72F wash water with cold tap up toward 85F, with a flow rate of about 0.75 GPM for as long as I need. This is plenty good enough for washing film or paper. We mostly process paper in the summer anyway, and when the tap gets to 88F the wash water goes to about 75F.
Not everything is perfect though. I would really like to run any flow rate for any length of time, at any reasonable cold tap temperature, but it will not happen with this small of a chiller. That would require more horsepower. Another thing to think about is the heat generated by the chiller. I had to add a powered wall vent next to the chiller to keep the room from heating up. The ultimate would be to vent the unit outside, but that isn’t practical for my location. . . so I just have to deal with it as best I can.
At least I do have a chiller and it does work. When I get ready to process film or print, I will fire up the chiller and allow it to cycle. This normally takes about fifteen minutes. I can then fill my washers, but I have to watch the temperature closely, because at full flow the chiller will run out of cold water pretty fast. When I see the mixing valve temperature start to rise, I will shut off the water and wait for the unit to cycle again.
Bottom line is, I would not want to be without my chiller. If I had the choice, I would upgrade to the larger ElKay ER191, which is a 19GPH unit. It would fit in the space now available. The original sink I installed the unit we have on did not have room. If I were going to suggest a chiller, I would say get the 19GPH unit. But do keep in mind that any chiller is better than none!
JB
 There are so many gadgets that have been devised over the years, and it always fascinates me how you can adapt a tool for some use other than what it was originally intended. One of my most valuable tools that I use regularly for mounting prints is a common Sewing Gauge. If you are a seamstress you probably know what this is used for. I had to look it up to find exactly what it was called. I just knew this would be something that I could use and it has proven invaluable to me.
I have used a six inch Sewing Gauge for years when mounting prints. I picked up several of these at a garage sale years ago and they are excellent for aligning prints on the mount. The sliding measuring guide is great to check, and double check, the edges of a photograph to be sure it is centered and aligned to the edge of the mat board. I have used a Zone VI Dry Mount Jig for many years, but I have also used two Sewing Gauges as a second check for proper alignment.
[nggallery id=18]
The typical Sewing Gauge is six inches in length and the movable guide will go from a depth of about 1/8 to 5 inches and is used to mark hems and make alterations. You can probably find these in even longer lengths. Take a look on line, or go by your local sewing retailer. They are not expensive and are really near worth their weight in gold. . . well. . . almost!
JB
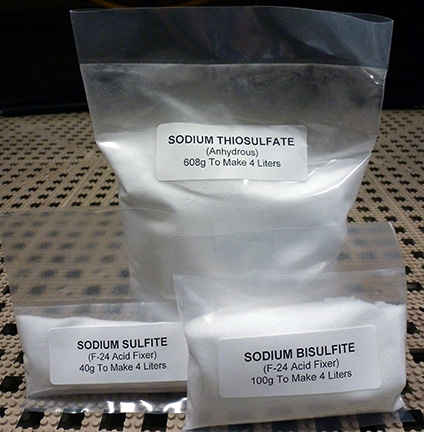 Mixing our own darkroom chemistry has become the established method around here. Since the demise of Zone VI chemistry, we are pretty much on our own when it comes to processing chemistry. Things like PyroCat-HD can easily be mixed by weighing out the necessary materials each time, since you are mixing stock solutions and it is not something you have to do every time you process film. I mix up the print developer as two stock solutions that are combined when a printing session starts. I keep one and two liter bottles of part A and B mixed and ready to go. That is just another element of the process. On the days we are not doing darkroom work, I am in there cleaning and mixing solutions.