darkroom

MORE SPOTTING MICROSCOPE INFORMATION

Spotting Microscope Since I had posted my original piece titled “SPOTTING MICROSCOPE” I  have received numerous additional questions.  Seems everyone is looking for an easier way to spot prints, and I will tell you one thing;  there is nothing better for print spotting than a good stereo microscope!  There just is no better way that I have found to see and eliminate those pesky spots we all have to deal with.

First a little information on what to look for.  The microscope is a modular device and you can configure it to suit your needs.  There are five main items you will need.

  1. POD:  this is the main body of the microscope
  2. EYE PIECES:  these are where you look into the unit and their design sets view and magnification (I use the Wide Field 10x)h4>
  3. FOCUS MOUNT:  this holds the POD and allows you to move it up and down in order to focus the unit (like focusing a view camera)
  4. g>STAND:  the stand holds the entire microscope assembly
  • ILLUMINATOR:  a concentrated light source you will need for spotting prints

Most of the questions I have received pertain to what microscope I use.  I had to do a little research as to the exact model I have.   What I use is not the latest model and is probably at least 30 years old.  The good news is quality microscopes are well-made and will last a lifetime if taken care of properly.

The unit I have is made by Bausch & Lomb and is the StereoZoom 4.   Here is a brief description;  “One of the most popular stereo microscopes of all time is the Bausch & Lomb StereoZoom 4 (SZ4), later taken over by Leica and also marketed under the Cambridge Instruments name. It was introduced in 1959 and made until 2000.”

They must have made many thousands of these units in many configurations.  They are plentiful on the used market.   Another question I get is how much do they cost?  That depends on condition and where you find the unit.  We have had ours for some time now and it seems we paid about $450.00 from a seller on eBay including shipping.
reconditioned and fully guaranteed unit from a specialty company will be more expensive.  Keep in mind that the stand is very heavy and adds to shipping cost.    My best recommendation is to purchase a unit with a good return policy if possible.JBH Spotting Microscope

Here is a great site with instructions on how to service and adjust the StereoZoom 4:

http://www.covingtoninnovations.com/stereozoom

I will add a few more comments that might be helpful.  When it comes to the Illuminator there are numerous choices.  The unit we use is an incandescent-type that uses lenses to focus the light into a concentrated beam that illuminates the print surface.   It mounts in the Focus Mount and works very well.  You can also use a Ring Light mounted to the bottom of the Pod.   There are numerous illuminators and some even use LEDs.  I am going to try a Ring Light that I have to see how well, and evenly, it lights the print surface.  Another thing I have not tried so far.

Another thing to consider is the Stand.  There are times I wish the arm of the stand was longer when working on larger prints.  I have been seriously looking at an Articulating Boom mount that attaches to the wall.  Wall mounting will free up work table area and the boom has a reach of about two feet.  Just something else to consider.

Hope this helps to clear up some of the questions.  As I said in my PREVIOUS POST, “. . . a stereo microscope is the Rolls Royce of spotting magnifiers.”

JB

Posted by JB Harlin in Darkroom, How-To, Photography

EDGE B&D CARD

Edge Bruning CardI keep harping on the same old line, but it is true that everyone has their own way of doing things and I am no different.  But it seems that I continue to get questions about how we work.  There seems to be a misconception that when you contact print that Burning and Dodging (B&D) are not possible.  That is 100% malarkey!   Whether you use a spring back or vacuum frame, the image on the negative is visible against the white printing paper.   Burning and dodging is exactly the same as enlarging.

Now having dispelled the myth about contact printing, and understanding things work the same, I find there are two B&D tools I use all the time.  Yes, there are times you will have to cut strange shapes to make a particular B&D tool for a certain image.  No matter what special shapes I may need, I find two shapes that are universally used most of the time.

By far my most used B&D shape is a rectangular piece of mat board.  I use this for edges, sides and most any other large areas.  The second most used B&D shape is a specially modified rectangle for edge burning.    I seem to forever need to burn all four edges of most prints and why burn each edge one at a time?  I cut a piece of mat board smaller in both dimensions than the print I am making.  Then I cut off all four corners at a 45 degree angle.  This is my Edge B&D tool and it sees a lot of use.  I can burn all four sides of a print in one exposure.  The farther you hold the tool from the print, the larger the area that is held back.  Moving the Edge B&D card either in a slow circular motion, or moving slowly up and down, yields a nice even edge burning all the way around the print.

I mostly print 8×10 and 11×14 negatives, and I mostly contact print, so I have two Edge B&D cards for those size prints.   I use a custom handle to hold dodging shapes fashioned after Fred Picker’s Lawton Dodger.  Most of the time, I have my Edge B&D card taped to my dodger.

This is something to think about and may work as well for you as it has for me.  And, this is not just for contact printing.  It works equally well for enlarging.  Try making your own Edge B&D card, you may like using it!

JB

Posted by JB Harlin in Darkroom, How-To, Photography

SELENIUM TONING

SELENIUM TONEREveryone has their personal way of doing most anything.   I have sorted through what works for me and it may not be the only way to do things, but it is the way I have refined and standardized my working habits.  (I hate the term ‘workflow’ sounds way too digital for me.)  What I have tried to do is explain how I work in the darkroom.  You can use my methods as a starting point and determine what works best for you.

Selenium toning of finished prints is a given for what we do.  Every print is toned in selenium, for permanence, a slight shift in print color, and to enhance tonal range.  We have used numerous dilutions of toner and what works for one paper and developer combination, may not work for another.  When it comes to the dilution and time, you have to experiment.

Here is how we selenium tone prints.  Not sure exactly where all of this came from.  Some from Ansel Adams, others from Fred Picker.  Never the less, here is our standard procedure.

Prints are developed, stopped in acid stop, then fixed in an acid sodium thiosulfate fixer for four (4:00) minutes.  The finished prints are rinsed in running water for five (5:00) minutes or so, then transferred to an archival washer.   The washer is used as a holding bath during a printing session that may last all day.

Once printing is finished, each print is evaluated and may receive further processing by some selective bleaching.  After bleaching, the prints are washed again in running water and again end up in the archival washer for storage.

At this point it is time to start toning.  We use three trays when selenium toning.  The first contains plain hypo (Hypo), the second selenium toner at some predetermined dilution (Toner), and the third tray is hypo clearing agent (HCA).

Prints are removed two at a time and placed, back to back, in the Hypo tray for about four (4:00) minutes.   This is your second fix.  The Hypo is an alkaline fix and is necessary to prevent stains, since any acid in the toning solution will result in undesirable stain.  If you use an acid first fix as we do, be sure to wash well before placing into the Hypo.  You do not want to carry any acid into the alkaline Hypo.

After the plain Hypo, prints are drained and transferred to the Toner tray.  Start the timer. . . Toning times vary.  We adjust the Toner dilution to yield a Toning time between two (2:00) to about four (4:00) minutes.   The Toner tray requires continuous agitation by tipping front to back and side to side.  As soon as the prints are in the Toner tray, two more prints from the washer are added to the Hypo tray.  The prints in the Hypo tray are used as a reference to judge the amount of change that is happening in the Toner tray.

When the prints in the Toner tray have reached the desired tone, they are drained and moved to the HCA tray.  The prints in the Hypo are moved to the Toner and two new prints are added to the Hypo.  When the HCA tray gets its second set of prints, the set that has been in the longest are rinsed in running water, then moved back to the washer.

This is a daisy chain process that continues until all of the prints have been process and are back in the washer.  The idea is to fix the prints for about four (4:00) minutes in the Hypo. . . Tone for two to four (2:00-4:00) minutes. . . then about four (4:00) minutes in the HCA.  These times may vary, and is not that critical.  You need to second fix, in Hypo, for no less than three (3:00) minutes and HCA for the same amount of time.

Once all of the prints are back in the washer, wash as usual. For us, our tested time is about one hour.  Be sure to test your washer for optimum wash time.  You will find the mixtures we use posted in the FORMULAS page here on this BLOG.

This is a whole lot more complicated to explain than to actually do.  It is a rhythm you pick up as you work through the prints and is really quick and easy.  One word of caution; once you begin to selenium tone your prints, you will never be satisfied if you don’t.

JB

Posted by JB Harlin in Darkroom, How-To, Photography

A LITTLE SELECTIVE BLEACHING

Selective bleaching is a technique that uses a very dilute solution of Potassium Ferricyanide, which is brushed on specific areas of a print to lighten the tone and increase contrast.  It must be done very judiciously and anyone practicing this technique must be prepared to ruin a few prints.  But, with a little patience and practice, bleaching is a powerful tool in the darkroom.  Selective bleaching can open up an entirely new avenue of expression.  Here is an example from a recent printing session.

First, here is the subject;  a blind cave between two large sandstone fins in Arches National Park.


Selective Bleaching

Next, the printing session;  the negative printed quite easily, without any manipulation.  It is quite interesting, but lacked depth and was somewhat depressed, especially at the bottom.  Also the wood and cracked mud needed to be lighter to draw the eye and enhance the feeling of depth.  Here is a side by side comparison of two prints, one before,  the other after selective bleaching. . . (this is a quick snapshot of the wet prints on the viewing stand before toning)

Selective Bleaching

Finally, the finished print;  we selenium tone every print we make, not only for permanence, but for the slight tonal shift and deepening of the contrast of the image.   Here is the finished dry print.  Note the change in color and contrast after selenium toning.

Selective Bleaching

I will not get into the technique employed, since selective bleaching is deceptively simple and is beyond the scope of this short article to adequately explain.  As I said before, be prepared to ruin a few prints.  This is another tool you can add to your arsenal of darkroom techniques. . . remember, it is always about the finished print.

JB


Posted by JB Harlin in Darkroom, How-To, Photography, The Darkroom Workshop

THOMAS DUPLEX SUPER SAFELIGHT FILTERS

Seems the last couple of times I have tested the darkroom safelight I have had to cut down the illumination.  That should be a clue that the filters are fading and it is time to replace them.  We use a Thomas Duplex Super Safelight that I rebuilt many years ago.  Since we have a small  darkroom I knew I needed to attenuate the light.  My original safelight was modified when I rebuilt it and the 35 watt lamp was replaced with a 18 watt lamp.  Note:  You have to replace the ballast and start capacitor if you change the lamp wattage.  Wasn’t that big a problem seeing how the original ballast was no good.  I purchase the safelight many years ago not working for little to nothing.

So, now I needed to replace the filters.  Since I am only interested in B&W, work that simplifies things for sure.  All I need to find is the correct filter and then I can assemble my own replacement.  I have plenty of scrap glass, and tape.

With a little research on the Internet I discovered that the hard part had already been done.  Seems a Rosco #19 “Fire” filter has the necessary bandwidth to filter out the annoying green and blue spikes in the low pressure sodium lamp spectrum.  And, seems that others had proven this the best way possible. . . they tested it in their own darkroom.

All I needed was to order some filter material.  Rosco filters are the industry standard for stage and film production and readily available.  That was way too easy.  The thing that I was still toying with was how to adjust the light output.  It finally came to me.  Why not put the #19 filter in the body position and then add a Neutral Density filter to the vane?  Yep, that would do it.  So I ordered a sheet of Rosco #19 filter and a sheet of 0.30 ND.

We have a lot of scrap glass around.  I cut new glass to fit the body and vanes using TruVue Conservation Grade UV glass.  Thought it wouldn’t hurt to add even more filtration.  I also found out why the factory uses tissue paper.  Without it, the filter material does not look that great against the glass and I could see that if any moisture were to condense in there, it could be bad for the filter.   I really didn’t want to use tissue paper and I had a roll of Gila frosted window film from another project.  This stuff is a self-adhesive plastic material used to frost windows.  It was exactly what I needed to put a smooth textured surface on the inside of the glass to keep the filter from sticking.  It also works well to diffuse the light.

One of my favorite tapes is the aluminum HVAC ducting tape.  It is lightproof, sticks and stays in place.  Slit a few pieces of tape, peel the backing and it will hold the filter sandwich in place with ease.

I placed the #19 filter in the body and 0.30 ND in the vanes.  My first test showed there was still too much light.  I was testing at my closest point to the safelight for the worst case situation.  I ended up adding a second layer of 0.30 which made for 0.60 ND, which is two full stops attenuation.  But remember, I was testing with the most sensitive VC paper we use at a very close proximity to the safelight.  Always test for the very worst case scenario. 

Once finished, I found that the darkroom is much brighter than before.  This proves that the filters do fade.  Now we are back in business.   With the vanes fully closed all VC and standard papers are safe.  I like to print on Azo, which allows me to open the vanes for even more light.

I will test again in a year or so and if I need new filters they are easily replaced.  I have plenty of material, the Rosco filter comes in a 24 x 24 inch square.  Enough for several more safelight filters, if and when they are needed.

JB

Posted by JB Harlin in Darkroom, DIY, How-To, Photography

2010 ADVENTURES IN THE DARKROOM

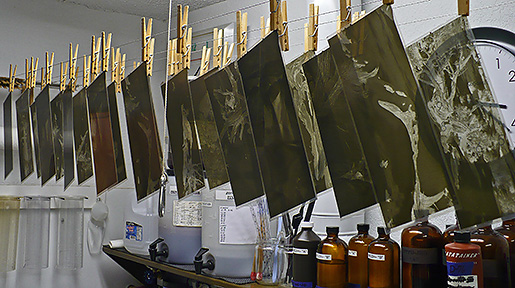
Time to start processing the film from the last trip to Utah. We spent 30 days on the road and photographed 20 days. That kind of working schedule generates a lot of LF and ULF film. Now comes the time to head to the darkroom for a little developing. Should take about 30 days to finish all of the film. Then we have to catalog and file, then proof to see what we have. Soon we will have some new film to start looking at with an eye toward making prints.

All film will be processed in a scratch-mixed Pyro developer, in small batches, by hand in open trays. Typically a day of processing will consist of 3-4 batches, normally totaling no more 30 sheets. We never try to push and do too many, if you get really fatigued, it is easy to make mistakes. This film is the culmination of hours of traveling and heaving heavy cameras in deep snow and ice, we do not want to do anything foolish now.

Hopefully we will find a few keepers in this batch of film. Watch here for more information and maybe a few new photos on the web site.
JB & Susan

Posted by JB Harlin in Darkroom, Film, Photography

ILFORD ULF FILM 2009

For the second consecutive year, one of the Harlin photographs has been chosen, along with a quote from the artist, to be included in the annual Ilford ULF film order press release. This year JB’s image titled “Tenaya Lake, 2007” will appear in the annual announcement and call for orders of special size film. Details can be found on the Ilford web site;

http://ilfordphoto.com/pressroom/latest.asp

We are again excited to be included in this year’s Ilford ULF film buy. A PDF, containing a larger version of the photograph, along with this year’s original release is available HERE.

Susan’s image from last year’s press release titled “Alabama Hills, Mt. Whitney” was also featured on display at the Ilford/Harmon booth at the 2008 PDN PHOTO PLUS International Conference and Expo in New York City. Last year’s press release can be found HERE as a PDF also.

Posted by JB Harlin in Photography

Hello & Welcome to the jbhphoto Blog

JB & Susan HarlinJ.B. and Susan Harlin comprise what could be considered members of a small, but growing, group of photographic artists that take the simple, basic approach very seriously. They use only time-honored tools and techniques for making their fine art black & white photographs. Their emphasis is upon making the photograph—not on the equipment, gadgets, or fads. J.B. says, “I feel that using the correct tool for the job is the most important decision you can make.”

This is exactly what they do. From the original conception of the image, to the finished framed fine art photograph, the emphasis is on quality—not quantity. Susan says, “I may spend a lot of time in the field and usually make relatively few negatives—but the ones I do make are well worth the effort.”

FINE ART PHOTOGRAPHY, THE OLD FASHION WAY

jbhphotoBLOG

Posted by JB Harlin in Commentary, Photography